A 3D printer camera lets you check a print from another room or from your phone, record a timelapse and, on some printers, pause a failed print automatically. Many newer Bambu Lab, Prusa and Creality machines have one built in or offer it as an option. Any other printer can get one through OctoPrint, a USB webcam or a Wi-Fi camera.
This guide covers built-in cameras, adding one to any printer, AI failure detection, timelapses, lighting and privacy. A camera pairs well with the other 3D printer accessories that earn their place.
The short answer
| Route | What you need | Strengths | Limits |
|---|---|---|---|
| Built-in camera | A printer that has one, such as current Bambu Lab models, the Prusa CORE One L+, Creality K1C or K2 Plus | Works in the maker’s app; many models detect failures | Tied to the maker’s software; some cameras have very low frame rates |
| Raspberry Pi with OctoPrint | A Raspberry Pi, a Pi camera module or USB webcam, a USB link to the printer | Works with many printers; local control; plugins add AI detection | Takes setup time; must not be exposed to the internet |
| Standalone Wi-Fi camera | Any indoor camera aimed at the printer | Quick and independent of the printer | No pause, no print data, no layer-synced timelapse |
Why use a 3D printer camera?
A 3D printer camera saves you trips to the printer and catches problems while they are still small. A quick look from your phone tells you whether the first layers stuck or the part came loose.
- Remote checks: see progress without standing next to the machine. NIOSH lists video camera monitoring among the ways to avoid standing too close to a printer and its emissions.
- Failure detection: on printers with AI monitoring, the camera spots “spaghetti” (tangled, failed extrusion) and pauses the job.
- First layer: a look during the first minutes shows whether the print is sticking; our guide to 3D printing first layer problems explains what to look for.
- Timelapses: a layer-by-layer video of the build, useful for sharing or spotting where a print went wrong.
A camera is not a safety device. NIOSH advises placing printers in areas with fire detection and suppression, so keep a working smoke alarm near the printer whether or not you watch it remotely.
What to look for in a 3D printer camera
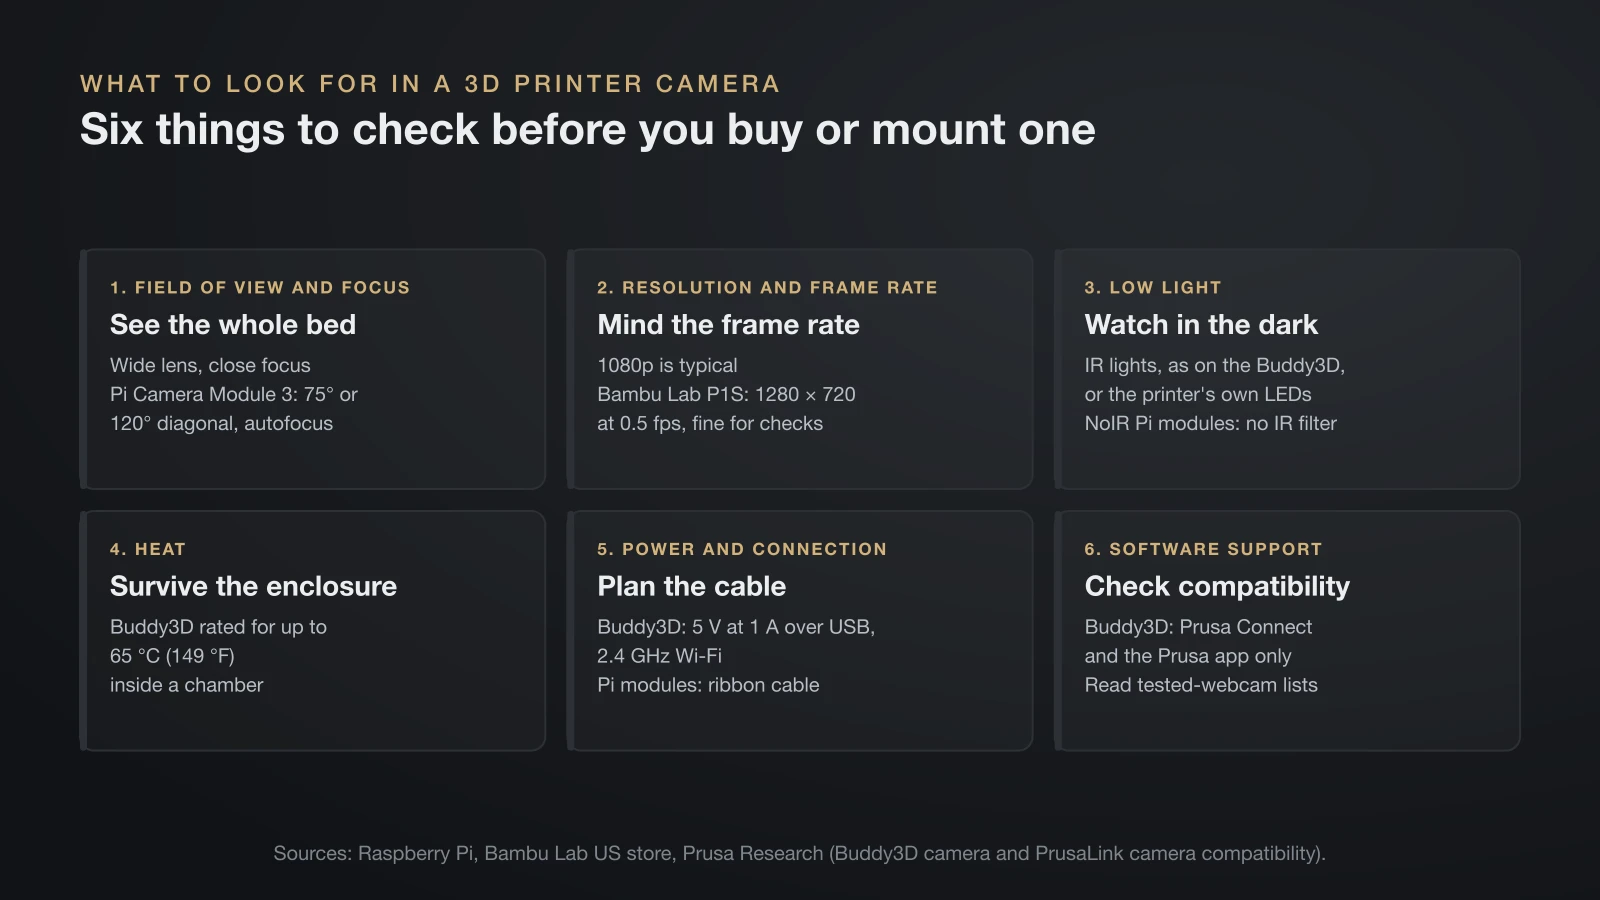
A good 3D printer camera focuses at close range, covers the whole bed and copes with dim light and, in an enclosure, heat.
- Field of view and focus: a wide lens sees the whole bed from close up. The Raspberry Pi Camera Module 3 comes in a 75° standard and a 120° wide version (diagonal), both with autofocus.
- Resolution and frame rate: 1080p is typical, but some built-in cameras have very low frame rates: Bambu Lab lists the P1S camera at 1280 × 720 and 0.5 frames per second, fine for checks but not smooth video.
- Low light: infrared (IR) illumination, as on Prusa’s Buddy3D camera, or the printer’s own LEDs let you watch in a dark room. Pi camera modules also come in NoIR versions without an infrared filter.
- Heat: a camera inside an enclosure must tolerate it. Prusa rates the Buddy3D for up to 65 °C (149 °F), and our guide to enclosed 3D printers lists chamber temperatures by model.
- Power and connection: the Buddy3D runs on 5 V at 1 A over USB and joins 2.4 GHz Wi-Fi; Pi camera modules use a ribbon cable, and the Pi Zero needs a different cable from the one in the box.
- Software support: check compatibility before buying. Prusa’s list of webcams tested with PrusaLink on a Raspberry Pi marks the Logitech C270 as not working properly.
Which 3D printers have a built-in camera?
Most current Bambu Lab printers have a built-in camera, and Prusa and Creality fit one to several enclosed models. The specs below come from each maker’s product pages and wiki.
| Printer | Camera | AI failure detection |
|---|---|---|
| Bambu Lab A1, A1 mini | Low-frame-rate camera, up to 1080p | None listed |
| Bambu Lab P1S | 1280 × 720 at 0.5 fps | None listed |
| Bambu Lab P2S | 1080p high-rate camera | Spaghetti, nozzle clumping, foreign objects |
| Bambu Lab X1C | Chamber camera, no night vision | Spaghetti; lidar first-layer inspection |
| Bambu Lab X2D, H2 series | Live view camera plus toolhead or nozzle cameras | Spaghetti, nozzle clumping, purge chute jams, plate check |
| Prusa CORE One+ | Optional 1080p night-vision camera, plugged into the mainboard | None listed |
| Prusa CORE One L+ | 1080p night-vision camera included | None listed |
| Creality K1C | Built-in AI camera | Spaghetti, foreign objects |
| Creality K2 Plus | Chamber and toolhead AI cameras | Print failures, build plate check |
Every printer in the table can record timelapses. Creality notes that the K1C’s alerts and video monitoring need its Creality Print or Creality Cloud app. For how the two biggest ecosystems handle cloud and local access, see our comparison of Prusa vs Bambu Lab.
How AI failure detection works
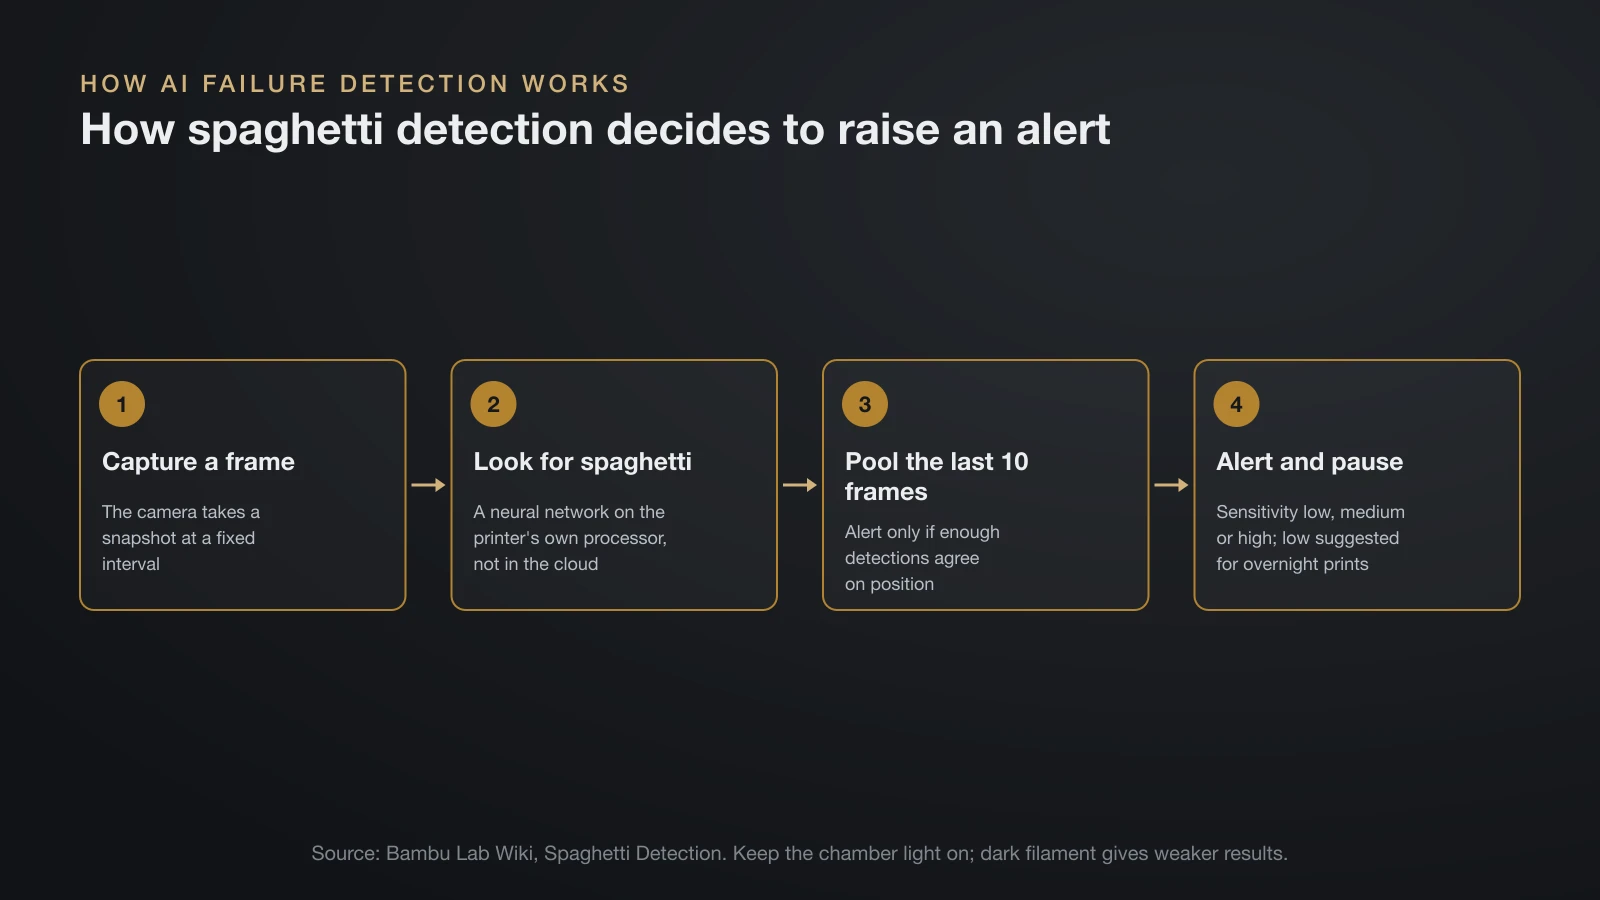
AI failure detection runs a trained image model on regular camera snapshots and pauses the print when it keeps seeing a failure. Bambu Lab’s wiki describes its version in three steps:
- The camera captures a frame at a fixed interval.
- A neural network on the printer’s own processor, not in the cloud, looks for spaghetti and scores each detection.
- The printer pools the last 10 frames and triggers an alert only if enough detections agree on position.
You choose low, medium or high sensitivity; Bambu Lab suggests low for overnight prints so small defects don’t cause pauses. The chamber light must stay on, and the company warns of false alarms and weaker results with black or dark filament. Because processing is local, detection also works in LAN Only mode, though model updates then arrive only with firmware.
The P2S adds nozzle clumping detection: it analyzes images every 60–120 seconds and usually catches a clump within 2 minutes. Bambu Lab says this mainly protects the toolhead, not the part.
For printers without built-in AI, Obico adds failure detection to OctoPrint. It can pause the print or just notify you, and you can use Obico’s cloud or host its open-source server yourself.
How to add a camera to any 3D printer
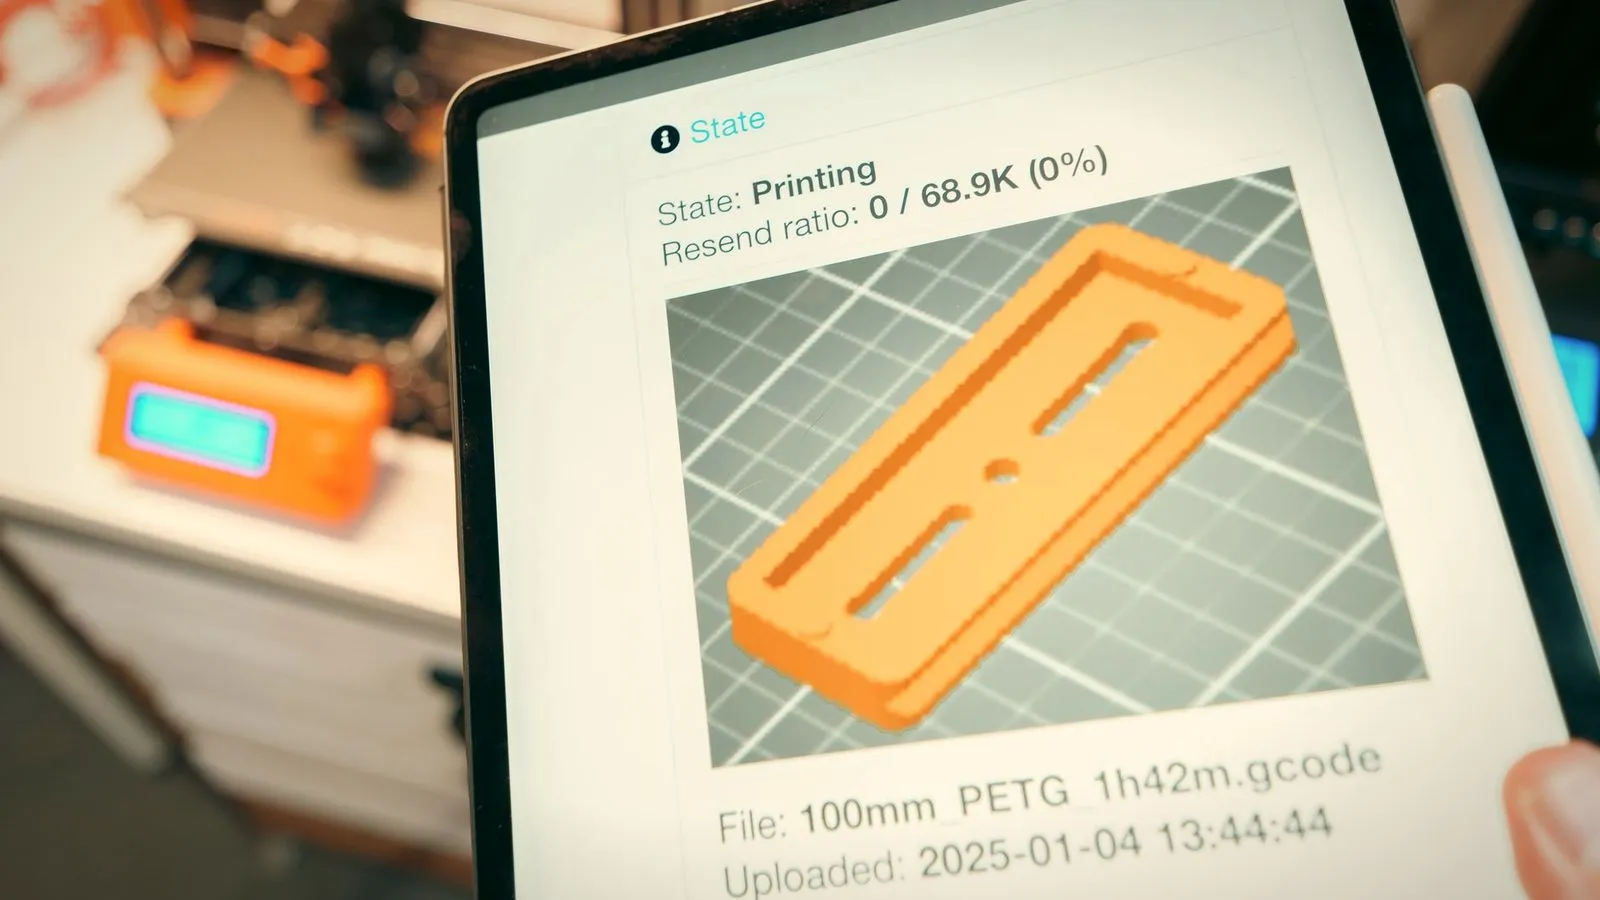
You can add a camera to any 3D printer through a Raspberry Pi running OctoPrint, your printer maker’s own camera, or a standalone Wi-Fi camera. The first two tie the camera to the print; the third only watches.
Raspberry Pi with OctoPrint
OctoPi, the ready-made OctoPrint image for the Raspberry Pi, bundles a streaming service for live view and timelapses that works with USB webcams and the Raspberry Pi camera. OctoPrint recommends a Pi 3B, 3B+, 4B or Zero 2, and warns against the original Zero and Zero W because streaming over their Wi-Fi hurt print quality. The Pi talks to the printer over USB.
Raspberry Pi’s own Camera Module 3 pairs a 12-megapixel sensor with autofocus and records 1080p video at 50 fps.
Your printer maker’s camera
Prusa’s camera setup guide lists a phone, a Raspberry Pi camera or a USB camera on a Raspberry Pi as ways to feed Prusa Connect, alongside its own Buddy3D camera. The Buddy3D works with the CORE One, MK4 and XL families, and with the MINI and MK3 through printable mounts; only the CORE One and HT90 can power it directly.
A standalone Wi-Fi camera
Any indoor security camera on a shelf or clamp gives you a live view from its own app. It knows nothing about the print, so it cannot pause a failure or time a timelapse to the layers.
Whichever route you pick, mount the camera where cables stay clear of belts and moving parts. On printers whose bed moves front to back, a frame-mounted camera sees the part slide in and out of view; Bambu Lab’s A series parks the bed at a fixed spot before each timelapse photo for this reason.
3D printer camera timelapse settings
A 3D printer camera timelapse takes one photo per layer or at a fixed interval, then joins the photos into a video. The main settings differ by platform.
| Setting | Bambu Lab | OctoPrint | Prusa Buddy3D |
|---|---|---|---|
| When photos are taken | After every layer | Off, on each Z change, or timed | Every 5–300 seconds |
| Storage | microSD card on A1, P1S and X1C; P2S can use internal storage | The Pi’s storage | microSD card, not included |
| Final video | Made automatically | Rendered after the print (configurable) | Edited in a separate video app |
On Bambu printers, video length depends only on the number of layers: at 30 frames per second, a 1,000-layer print gives a video of about 33 seconds. Smooth mode moves the toolhead aside for each photo and uses a prime tower to absorb leaking filament, so it looks cleaner but adds print time. On the A series, traditional mode skips the tower and hides the pause mark in the infill.
Lighting and camera placement
A 3D printer camera needs steady light, because both AI detection and timelapses depend on a clear view. Bambu Lab’s spaghetti detection needs the chamber light on: the printer switches it on at the first layer, but if you turn it off manually, it stays off.
- Night viewing: the X1 camera has no night vision and relies on the printer’s LED bar; the Buddy3D switches between day, night and auto modes using its IR lights.
- Glare and dirt: Bambu Lab asks for a clean lens free from glare for nozzle clumping detection, and its printers warn when the camera is dirty or blocked.
- Changing daylight: Bambu timelapses lock exposure at the start, so a print that begins in daylight can look dark in the live view by evening.
- Angle: aim at the nozzle and the full bed from slightly above, so a part that comes loose stays in frame.
Privacy and security of connected printer cameras
A connected printer camera is a live video feed from your home, so treat it like any security camera. The main choice is whether the video leaves your local network.
- Bambu Lab: by default, the Bambu Handy app shows the camera from anywhere through Bambu’s cloud. In LAN Only mode, Handy stops working, but Bambu Studio still shows the live view. Since 2025, Bambu’s firmware also requires authorization for remote video access.
- Prusa: the Buddy3D runs firmware customized by Prusa and talks only to Prusa’s servers, and it can stream locally over RTSP to a player such as VLC. Prusa’s Critical Infrastructure bundle for the CORE One L has no Wi-Fi circuitry and no built-in cameras.
- OctoPrint: its developers call putting OctoPrint on the public internet “a terrible idea”, because an intruder could control motors and heaters and even reflash the printer’s firmware. Use a remote access plugin or a VPN instead.
For any connected camera, the FTC recommends changing the default username and password, turning on two-factor authentication, updating firmware, disabling features you don’t use, securing your router and checking the camera’s access logs.
The bottom line
A 3D printer camera is worth having for remote checks and timelapses, and on printers with AI detection it can stop a failed print before it wastes hours. If your printer has one built in, use the maker’s app; otherwise a Raspberry Pi with OctoPrint or the maker’s add-on camera ties the video to the print. Keep the lighting steady, the lens clean, and the feed off the open internet.
Sources
- Bambu Lab Wiki: Spaghetti Detection, P2S Visual Detection, TimeLapse for X1/P1/P2S/H2S, TimeLapse for A Series, LAN Mode, Introduction to X1/X1C; Bambu Lab Blog: Authorization control system (detection, timelapse, lighting, LAN mode, authorization)
- Bambu Lab US Store: A1, A1 mini, P1S, P2S, X2D, H2D, refurbished X1C; Creality: K1C, K2 Plus Combo (camera specs and detection features)
- Prusa Research: Buddy3D camera, Buddy3D camera guide, CORE One+, CORE One L+, Camera setup for PrusaLink and Prusa Connect, Camera compatibility for PrusaLink (camera specs, intervals, supported cameras)
- OctoPrint: Download and OctoPi, Safe remote access, config.yaml timelapse settings, Obico plugin; Raspberry Pi: Camera Module 3 (boards, remote access, timelapse, camera specs)
- FTC: Securing Your Internet-Connected Devices at Home; NIOSH: Approaches to Safe 3D Printing, publication 2024-103 (device security steps, camera monitoring to reduce exposure, fire detection)