Most 3D printing first layer problems come from four causes: a nozzle set too high or too low (the Z offset), a dirty build plate, an uneven bed, or first-layer settings that are too fast or too cool. Gaps between lines mean the nozzle is too high; ridges, ripples and scraping mean it is too low.
Leveling and Z offset work together, and our guide on how to level a 3D printer bed covers the leveling side step by step. This guide starts from what you see on the bed: a symptom table, how to set the Z offset on each firmware family, first layer slicer settings, and a pre-print checklist.
The short answer
Check these five things, in this order, before you touch anything else:
- Clean plate. Oils and dust cause patchy adhesion in fixed spots.
- Seated plate and clean nozzle. Debris under the plate or plastic on the nozzle changes the height.
- Bed leveling or calibration after the printer was moved or the plate changed.
- Z offset: lines should be slightly flattened and touching, with no gaps and no ridges.
- Slow first layer at the filament’s recommended temperature.
Print a single-layer test square after each change, so you judge one variable at a time.
What does a good first layer look like?
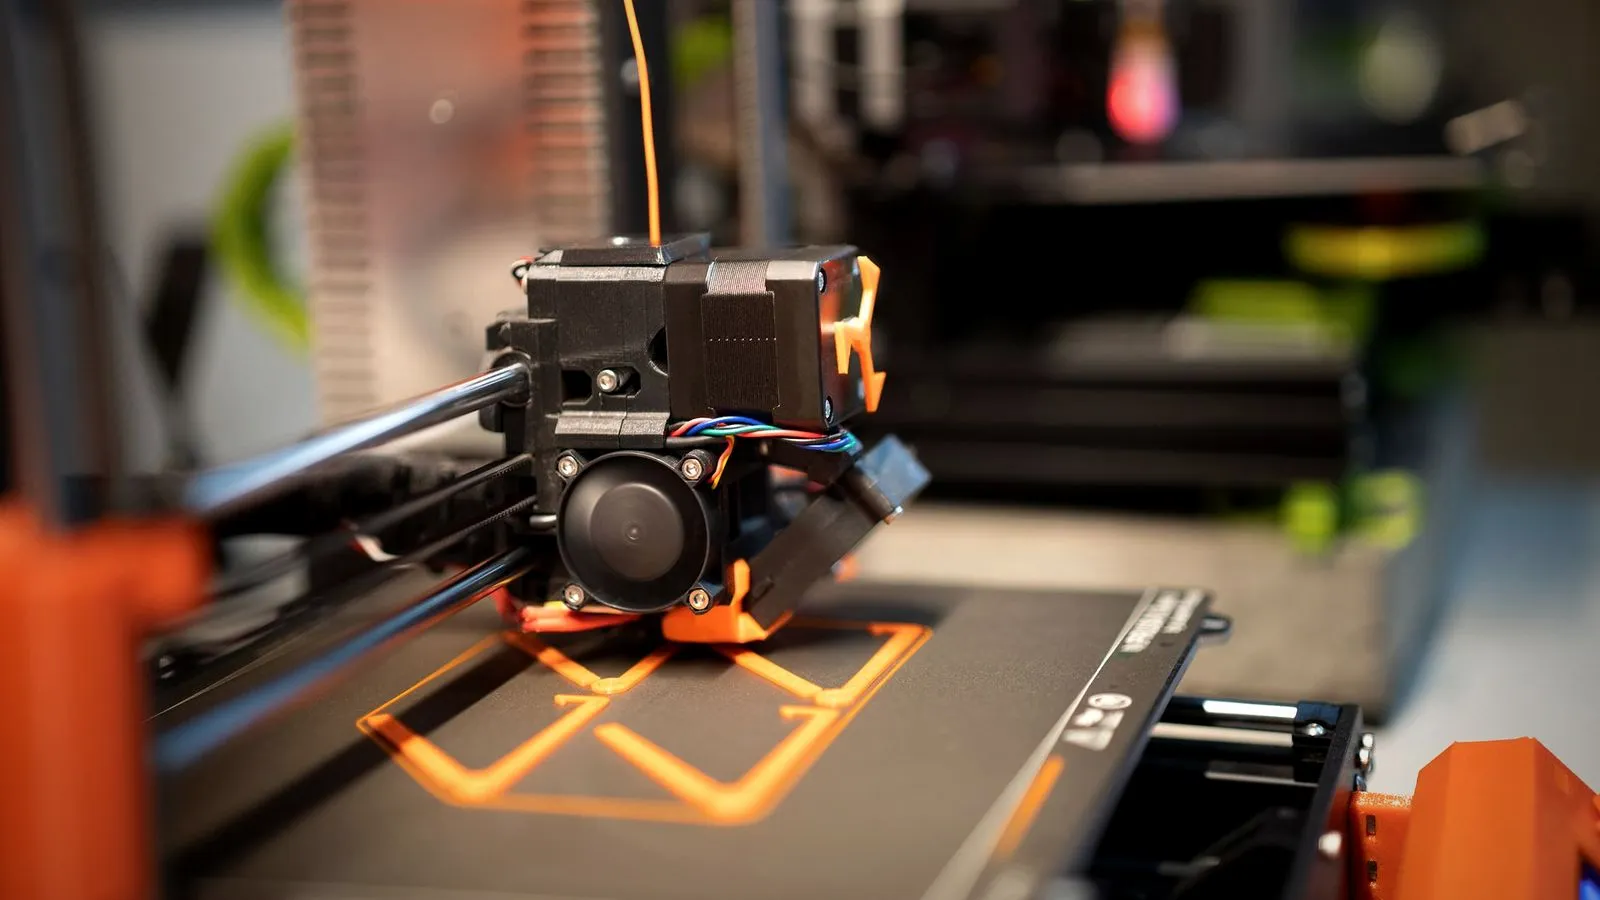
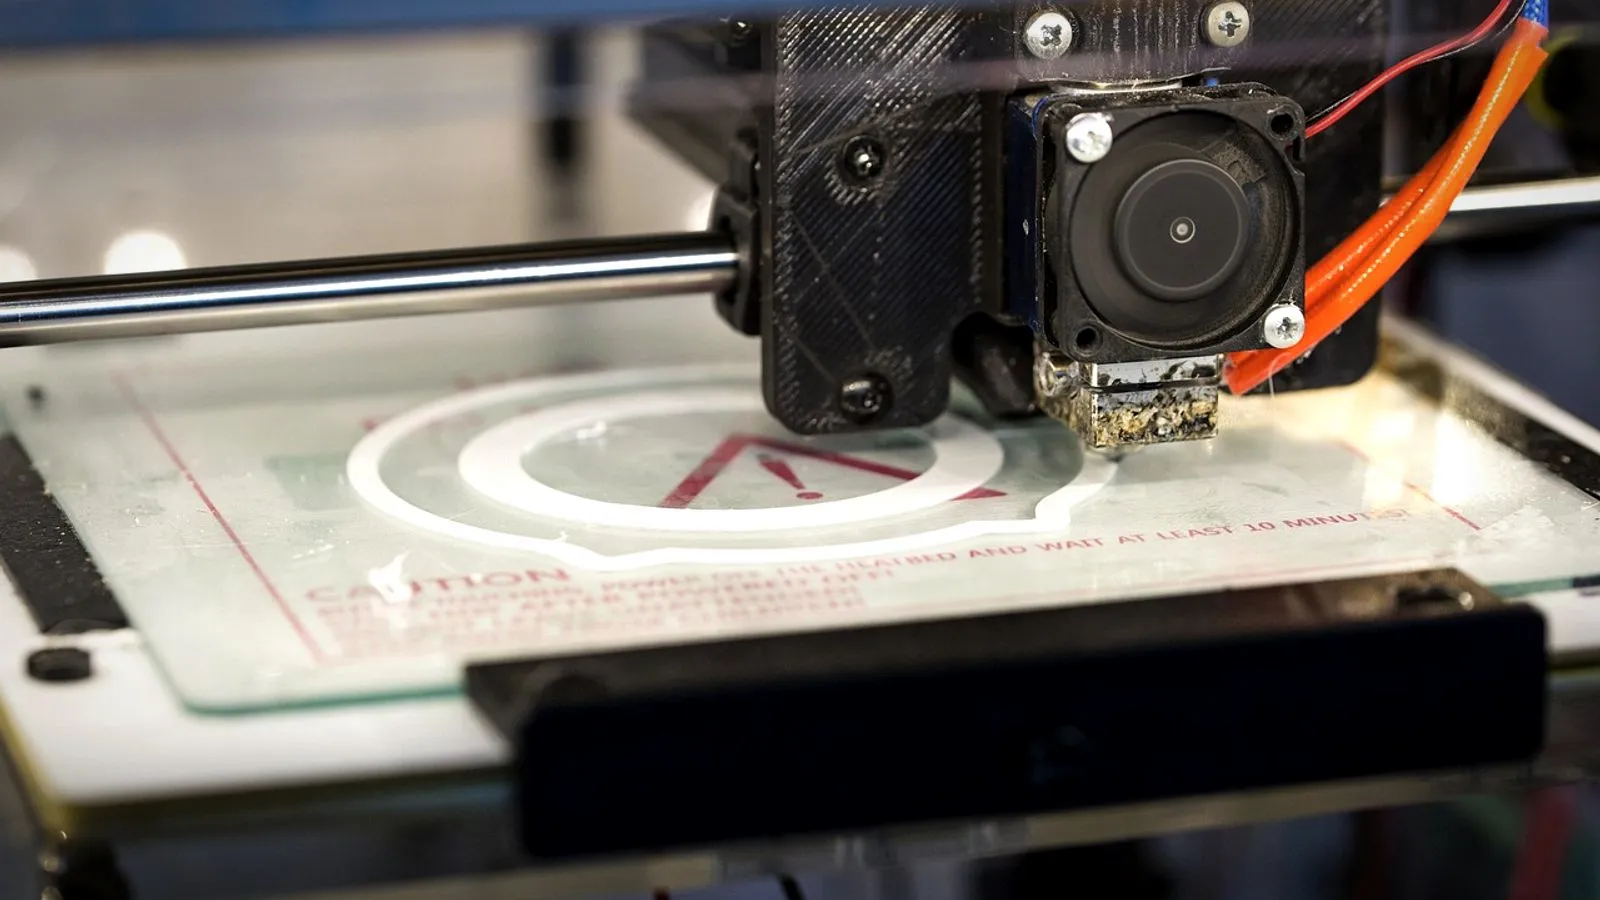
A good first layer is smooth, even and well bonded, with lines that overlap gently and leave no gaps or raised ridges. Bambu Lab adds that it should look the same everywhere on the plate; if one area differs, the bed is uneven there or the nozzle height is off.
Watch it while it prints. Bambu Lab’s rule: thin, wavy lines that barely stick mean the nozzle is too high, and lines squashed into raised edges, or a nozzle that drags, mean it is too low. Minor flaws are fine; Bambu Lab’s P2S guide says small defects on about 10% of an otherwise smooth first layer usually don’t affect the print.
To test, Bambu Lab suggests a cube 0.2 mm thick, scaled to cover most of the plate (in Bambu Studio: right-click the plate, Add Primitive, Cube). Any slicer can do the same with a thin square.
3D printing first layer problems: symptom, cause and fix
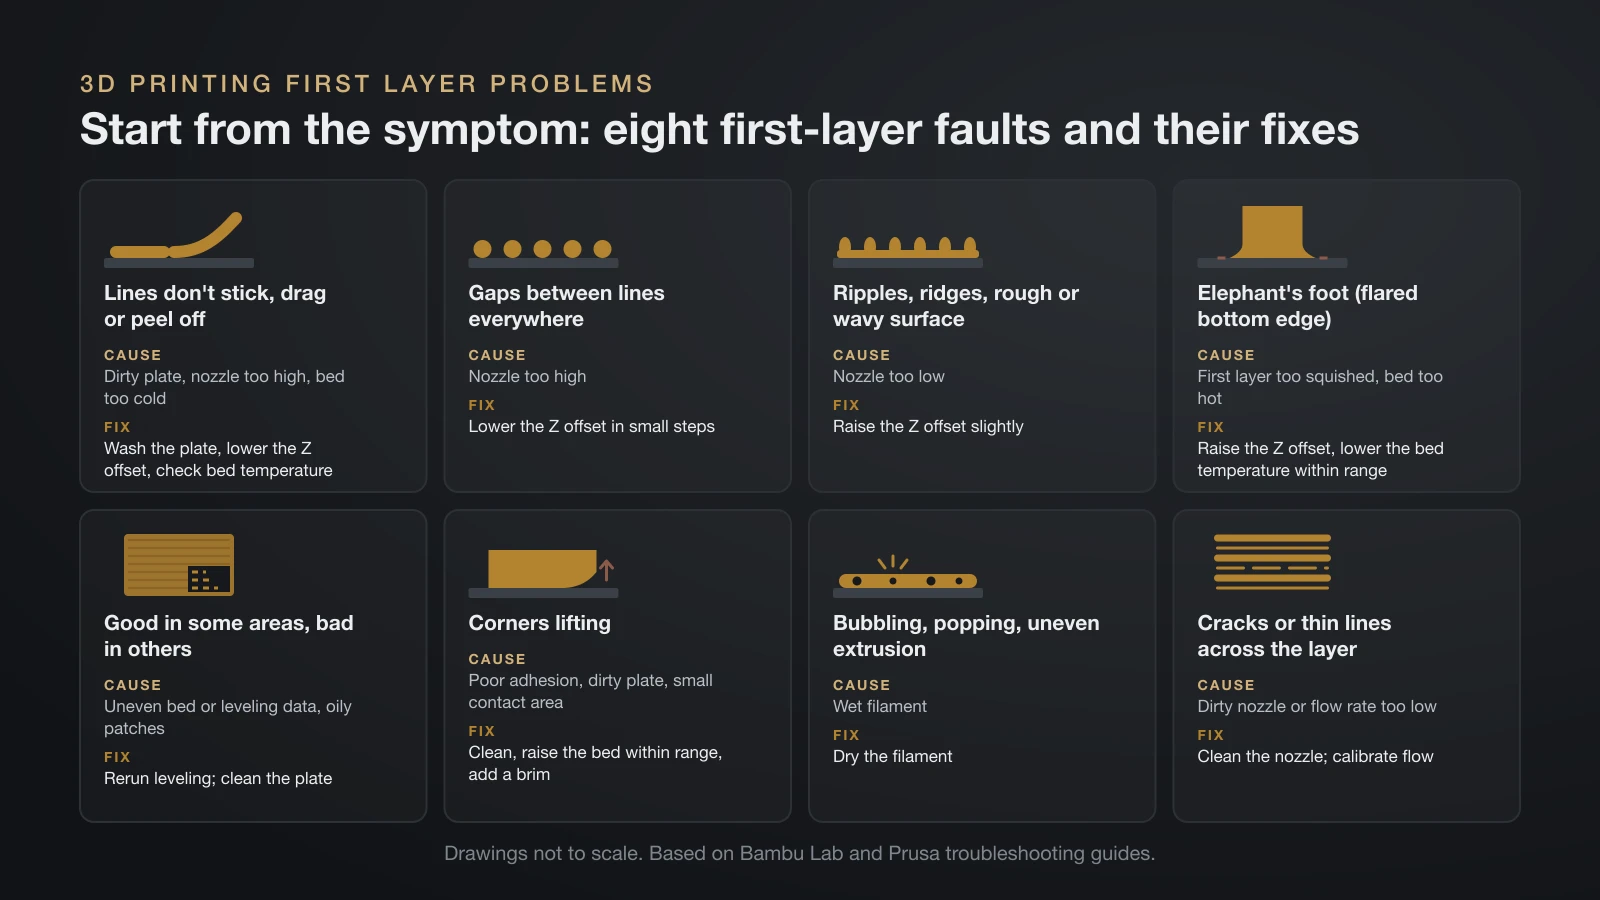
Each 3D printing first layer problem has a typical cause, so start from the symptom. This table combines Bambu Lab’s and Prusa’s troubleshooting guides.
| What you see | Likely cause | Fix |
|---|---|---|
| Lines don’t stick, drag or peel off | Dirty plate, nozzle too high, bed too cold | Wash the plate, lower the Z offset, check bed temperature |
| Gaps between lines everywhere | Nozzle too high | Lower the Z offset in small steps |
| Ripples, ridges, rough or wavy surface | Nozzle too low | Raise the Z offset slightly |
| No plastic comes out at the start | Nozzle so close it blocks the flow, or a clog | Raise the Z offset; check the nozzle |
| Elephant’s foot (flared bottom edge) | First layer too squished, bed too hot | Raise the Z offset, lower the bed temperature within range |
| Good in some areas, bad in others | Uneven bed or leveling data, oily patches | Rerun leveling; clean the plate |
| Corners lifting | Poor adhesion, dirty plate, small contact area | Clean, raise the bed within range, add a brim |
| Bubbling, popping, uneven extrusion | Wet filament | Dry the filament |
| Cracks or thin lines across the layer | Dirty nozzle or flow rate too low | Clean the nozzle; calibrate flow |
| Lines pulled loose on small features | First layer too fast | Slow the first layer |
Nozzle height problems
Most rows in the table come down to nozzle height. Prusa explains the too-low case: the plastic has no room to leave the nozzle, so it blocks the opening, and nothing extrudes for the first layer or two. Bambu Lab adds that a nozzle too close can scrape and damage both nozzle and plate and make parts hard to remove.
Don’t squash the first layer to fix poor adhesion. Prusa warns that a nozzle set too low can damage the sheet and cause vibration, and that this damage isn’t covered by its warranty. Clean the plate first.
Wet filament and flow
Bubbling or popping comes from moisture. Bambu Lab explains that absorbed water turns to steam inside the hotend and disrupts the flow, so the fix is drying the spool, not changing settings. Cracks or under-filled lines across the whole layer, on the other hand, point to a dirty nozzle or a flow rate set wrong; our guide on how to calibrate a 3D printer covers the flow test.
Mechanical causes
Sometimes the nozzle itself moves. On the A1, Bambu Lab traces a first layer that is too low to loose screws on the hotend heating assembly or an unfastened clip, which let the hotend shift down under extrusion pressure. On Prusa’s CORE One and MK4 family, the nozzle must be pushed fully up, with the printer cold and off, before the thumb screws are hand-tightened.
What is Z offset in 3D printing?
In 3D printing, Z offset is a small correction to the distance between the nozzle and the bed at Z = 0. Klipper defines the probe version as the distance between nozzle and bed when the probe triggers, and Marlin stores it as the nozzle-to-probe offset.
The sign works the same way on every system: a more negative value brings the nozzle closer, and a more positive value lifts it. Prusa’s Live Adjust Z moves from -0.500 to -0.600 to go closer; Klipper’s SET_GCODE_OFFSET Z=0.2 adds 0.2 mm to every Z move. Change it in steps of a few hundredths of a millimeter.
How to set the Z offset by printer and firmware
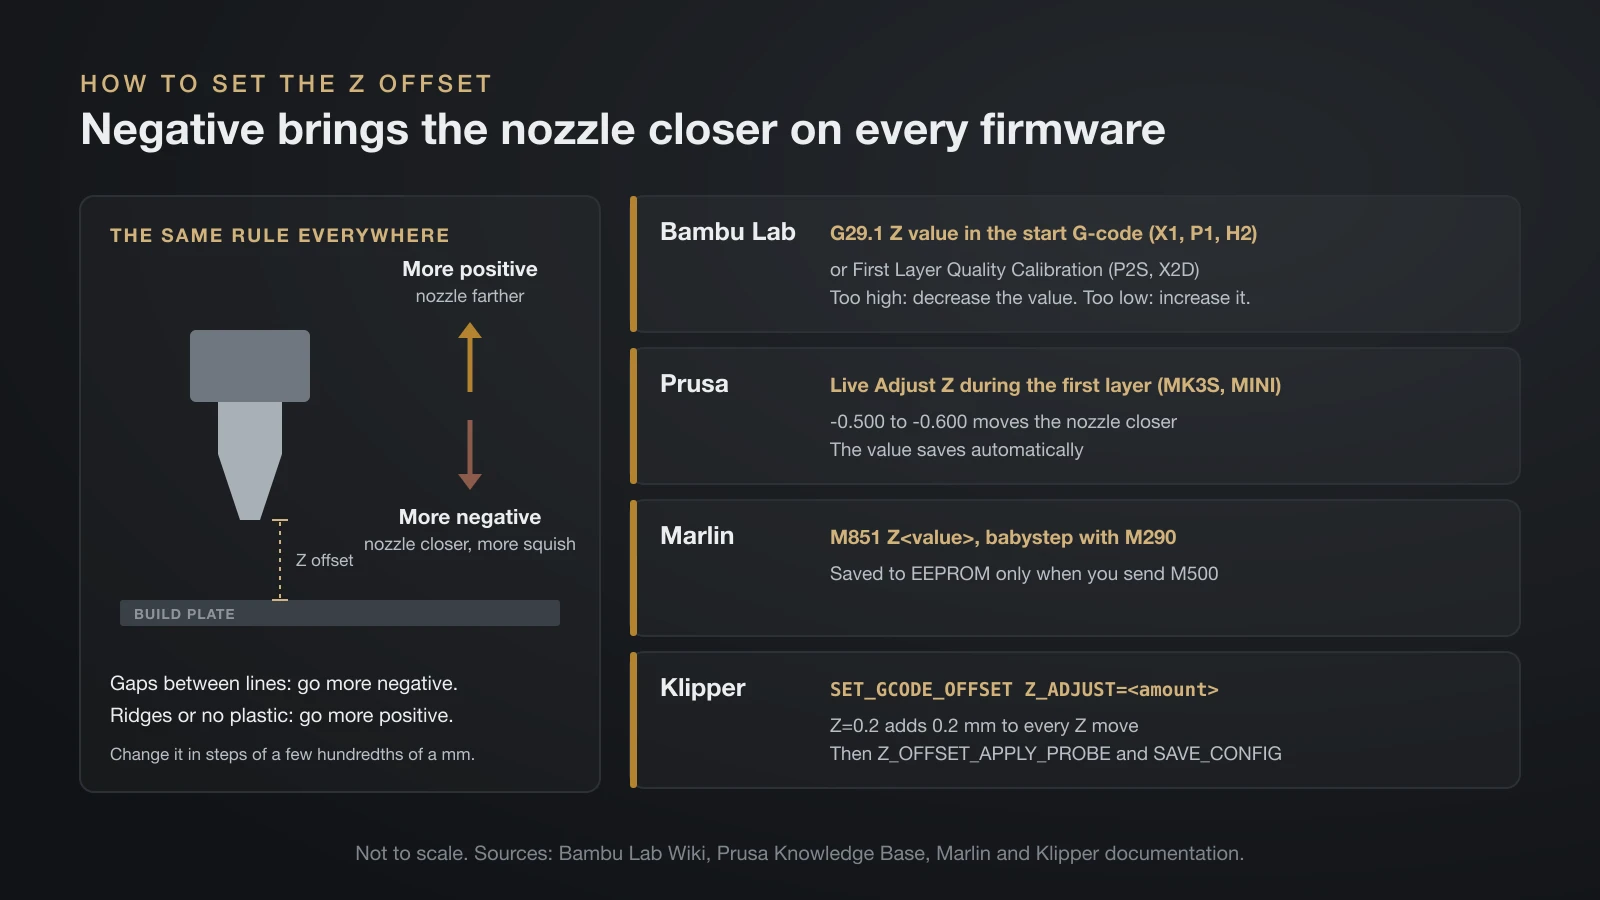
How you set the Z offset depends on the firmware and on whether the printer measures nozzle height itself. Always recheck with a test print.
Bambu Lab printers and Bambu Studio
Bambu Lab printers measure nozzle height during calibration, so Bambu Studio has no simple Z offset field. Run Print Calibration first, with Auto Bed Leveling turned on, and clean the nozzle, because Bambu Lab says residue on it causes leveling errors.
If the first layer is still off, Bambu Lab’s model-specific guides offer a temporary fix:
- X1, P1 and H2 series: in Printer Settings, open the machine start G-code and change the value in
G29.1 Z{-0.04}. The default differs by model: -0.04 in the X1/P1 guide, -0.02 for the H2D and -0.01 for the H2S, on textured plates. For the X1 and P1, Bambu Lab’s suggested range is -0.06 to 0 mm on textured plates and -0.01 to 0.01 mm on others. - P2S and X2D: use Calibration, then First Layer Quality Calibration, on the printer. Bambu Lab suggests steps of 0.01–0.02 mm, up to 0.05 mm.
Too high means decrease the value; too low means increase it. Bambu Lab stresses that this is a stopgap: once the cause is fixed, return to the default and rely on leveling.
Prusa
On printers with Live Adjust Z, such as the MK3S and MINI, turn the knob during the first layer; the value saves automatically. Prusa says typical values fall between -1.500 and -0.200. The CORE One, MK4/S, MK3.9/S and XL use a load cell that calibrates the first layer before each print, so manual Live Z isn’t needed; PrusaSlicer also has a Z offset under Printer Settings, General.
Marlin and Creality
Marlin stores the probe offset with M851 Z<value> and saves it with M500. Babystepping with M290 adjusts Z during a print; if the firmware has BABYSTEP_ZPROBE_OFFSET enabled, it also changes the probe offset, which you then save with M500. Marlin notes that most probes trigger below the nozzle, so the probe Z offset is usually negative.
On Creality’s Ender-3 S1 Pro, the setting is on screen: after CR Touch auto leveling, adjust the Z-axis compensation value in the leveling menu until the nozzle sits about one sheet of A4 paper above the bed.
Klipper
Run PROBE_CALIBRATE, do the paper test at the prompt, ACCEPT and SAVE_CONFIG. For fine tuning during a print, use SET_GCODE_OFFSET Z_ADJUST=<amount>, then make it permanent with Z_OFFSET_APPLY_PROBE (or Z_OFFSET_APPLY_ENDSTOP on printers without a probe) and SAVE_CONFIG. Klipper says moving the hotend or probe invalidates the calibration.
Why does my printer auto home and ignore the Z offset?
A printer usually “ignores” the Z offset because the value was never saved, because homing and leveling don’t use it the way you expect, or because the start G-code turns leveling off. Check these in order:
- The value wasn’t saved. Marlin writes settings to EEPROM only when you send
M500. In Klipper, aSET_GCODE_OFFSETadjustment isn’t permanent until you apply it and runSAVE_CONFIG. - The offset belongs to the probe, not to homing. Marlin says probe offsets don’t change the current coordinates; they apply to later probing. If Z homes on a mechanical endstop, the probe offset doesn’t move Z = 0.
- Homing switched leveling off. Marlin’s documentation says
G28disables bed leveling by default. Your start G-code must re-enable it withM420 S1, or the firmware must be built withRESTORE_LEVELING_AFTER_G28. - Something changed after calibration. Klipper notes that moving the hotend or probe, or retramming a bed with an offset probe, invalidates
PROBE_CALIBRATEand the mesh with it. - The printer re-measures. Bambu Lab and Prusa load-cell printers probe nozzle height themselves, so hand-entered offsets act only as small corrections on top.
First layer settings in the slicer
The right first layer settings are slightly thicker, wider and slower than the rest of the print, at the filament’s recommended temperature. These are good starting points from official sources, all for a 0.4 mm nozzle:
| Setting | Starting point | Source |
|---|---|---|
| First layer height | 0.25 mm | Bambu Lab, for adhesion problems |
| First layer line width | Wider than normal; 0.5 mm | Bambu Lab |
| First layer speed | 30 mm/s walls, 60 mm/s infill; or about 75% for three layers | Bambu Lab; Prusa |
| PLA temperature | 215 °C (419 °F) first layer, 210 °C after; bed 60 °C (140 °F) | Prusa profile |
| PETG temperature | 230 °C first layer, 240 °C after; bed 85 °C, then 90 °C | Prusa profile |
| Part cooling fan | Off or low for the first layers | Prusa (PETG); Bambu Lab (Cool Plate) |
Bambu Lab calls these settings a solid foundation for the rest of the model, notes that a slower first layer gives the plastic more time to bond, and suggests starting the secondary cooling fan only after the first three layers when PLA won’t stick to its Cool Plate.
Temperature needs a light touch. Prusa suggests raising the bed 5–10 °C for materials that don’t adhere, but Bambu Lab warns that too much bed heat with PLA and PETG can cause elephant’s foot and clogs. Our guides to PLA temperature and PETG temperature list full ranges; the slicing workflow itself is covered in our guide to converting STL to G-code.
Pre-print checklist to prevent first layer problems
A short routine before each print prevents most 3D printing first layer problems:
- Clean the plate if anyone touched it, and handle it by the edges. Our guide on how to clean a 3D printer bed covers each surface.
- Seat the plate with no plastic scraps under it; Prusa lists leftovers and a bent sheet as causes of uneven first layers.
- Pick the right plate in the slicer. Bambu Lab reminds you to match the plate type, and to use glue on its plates for PETG, ABS, ASA and nylon. Our 3D printer build plate guide compares surfaces.
- Check the nozzle is clean and the hotend doesn’t wobble.
- Rerun leveling if the printer was moved, stored or had its bed or plate changed.
- Use dry filament.
- Watch the first layer and adjust the Z offset live if your printer allows it.
Bed adhesion tricks such as glue and brims, and warping of large parts, will get guides of their own.
The bottom line
Read the first layer before changing anything: gaps mean the nozzle is too high, ridges and ripples mean it is too low, and patchy areas point to a dirty plate or uneven bed. Clean and level first, then adjust the Z offset in small steps with a test square, using your firmware’s own method and saving the result. Finish with a slightly thicker, wider and slower first layer at the filament’s recommended temperature.
Sources
- Bambu Lab Wiki: First layer test print, first-layer guides for the X1/P1, P2S, X2D, H2D, H2S and A1, Textured PEI plate guide, Cool Plate guide and plate precautions
- Prusa Knowledge Base: First layer issues, Live adjust Z, Loadcell, PLA and PETG material guides (first layer temperatures, fan)
- Marlin documentation: M851, M290, G28 and M420
- Klipper documentation: Probe calibration and G-Codes (SET_GCODE_OFFSET, Z_OFFSET_APPLY_PROBE, Z_OFFSET_APPLY_ENDSTOP)
- Creality Wiki: Ender-3 S1 Pro user manual (Z-axis compensation after CR Touch leveling)