To paint 3D prints so they look finished, sand away layer lines, fill what remains with filler primer or putty, prime, then apply thin coats of acrylic or plastic-rated spray paint and seal with a clear coat. PLA, PETG, ABS and cured resin all take paint well; good adhesion comes from surface prep, not a special paint.
The rest is patience: thin coats, drying time between steps and the right protection for spray paint and sanding dust. This guide covers the full workflow, which paint to use for which job, material-specific tips and real dry times from a paint maker’s data sheets. Painting figures has extra tricks of its own, covered in our guide to 3D printed action figures.
The short answer
- Clean up: remove supports and nubs.
- Sand: start around 120–180 grit and work up to 600 or finer; sand PLA wet.
- Fill: hide layer lines and seams with sandable filler primer or putty, then sand again.
- Prime: one thin, even coat for grip and to reveal flaws.
- Paint: spray paint for large areas, acrylics by brush for detail, an airbrush for gradients.
- Seal: matte, satin or gloss clear coat, then wait days, not hours, before heavy handling.
Can you paint 3D printed items?
Yes. FDM prints in PLA, PETG, ABS and ASA, and fully cured resin prints, all accept primer and paint. What decides whether paint lasts is the surface: clean, dry, lightly scuffed plastic holds paint, while a greasy or glossy one lets it peel.
Paint makers say the same. Rust-Oleum’s data sheets call for washing surfaces with detergent, rinsing and drying them, and sanding smooth, glossy finishes to give paint a profile to grip. They also warn that some plastics, such as polyethylene, may hinder adhesion, so test in a hidden spot first. Printed plastics are no exception.
How to paint 3D prints, step by step
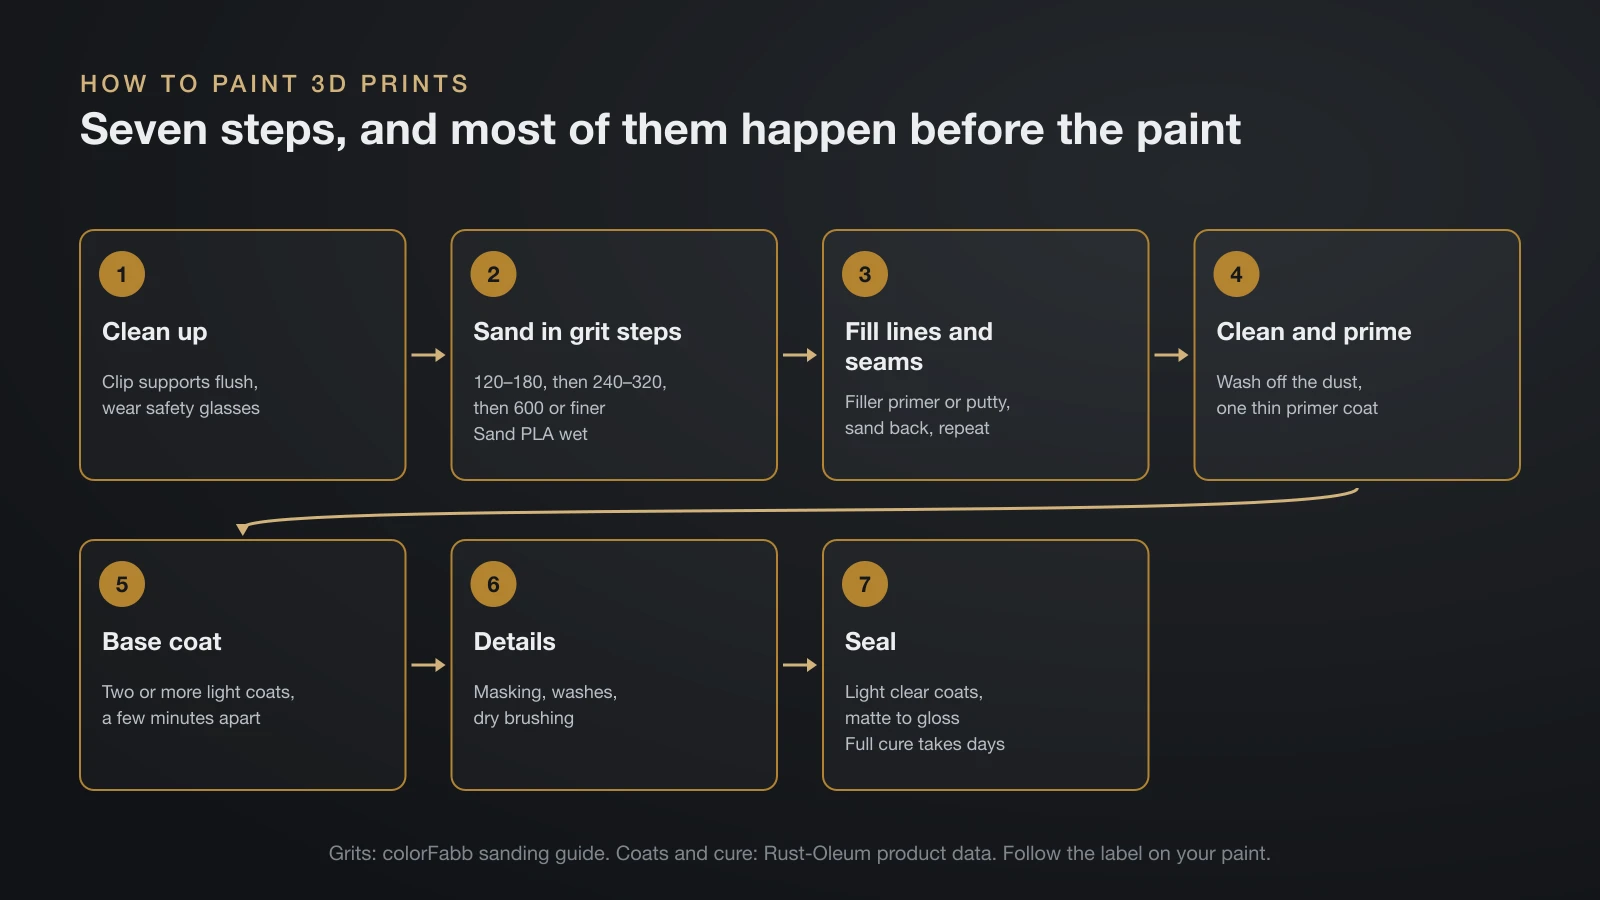
Plan on a few sessions rather than one afternoon, because primers, paints and clear coats each need drying time.
Step 1: Remove supports and clean up
Clip supports flush with side cutters, then sand or trim the nubs instead of twisting them off. Wear safety glasses: NIOSH recommends eye protection for cutting, grinding and sanding.
Step 2: Sand in grit steps
Start coarse enough to flatten layer lines and support scars, then move to finer grits so the scratches from each step disappear. colorFabb’s sanding guide for its PLA-based metal fills starts at 120–180 grit until the print lines vanish, moves to 240–320 and finishes at 600 or finer.
Sand PLA wet: Prusa notes that PLA can be sanded but needs water cooling. PETG, ABS and ASA sand well wet or dry, according to Prusa’s material guides. Go easy on edges and small details, which disappear fast.
Step 3: Fill layer lines and seams
Filler primer is a high-build primer that fills minor imperfections and sands smoothly. Rust-Oleum’s 2-in-1 Filler and Sandable Primer can be wet sanded as soon as it is dry and dry sanded after 2–4 hours. Its label lists metal, wood and fiberglass rather than plastic, so try it on a scrap print first.
Apply two or more light coats, sand back, and repeat until the lines are gone. Rust-Oleum’s instructions for its spray-gun Filler Primer call for block sanding with 320–400 grit. For deeper gaps and glued seams, use a sandable putty or body filler, let it harden fully and sand it flush.
Step 4: Clean and prime
Wash off sanding dust with water and a little detergent, rinse and let the part dry completely. Then prime. For best adhesion, Rust-Oleum tells users of its plastic primer to apply one thin coat instead of one heavy coat or several coats.
Primer is also an inspection tool. The even color shows scratches, pinholes and layer lines you missed, so fix them now with a touch of putty or filler primer and re-prime those spots.
Step 5: Apply the base coat
Spray or brush thin coats rather than one heavy one. Rust-Oleum’s spray instructions call for two or more light coats a few minutes apart to avoid drips and runs. With acrylics, thin the paint slightly with water so brush strokes level out, and build up color in layers.
Step 6: Add details, washes and highlights
Mask areas with painter’s or modeling tape for crisp color edges, and let each color dry thoroughly before taping over it. For depth, a thin wash settles into recesses and dry brushing picks out raised edges; our action figure guide walks through these figure techniques. Blocky prints, such as Minecraft 3D prints, are an easy first project because flat faces mask cleanly.
Step 7: Seal with a clear coat
A clear coat protects paint from handling and evens out the sheen. Rust-Oleum’s 2X clear comes in matte, satin, semi-gloss and gloss, applied in two to three light coats a few minutes apart over its color coat. Keep the clear coat thin on moving parts and joints so they still move.
Best paint for 3D prints: which paint for which job
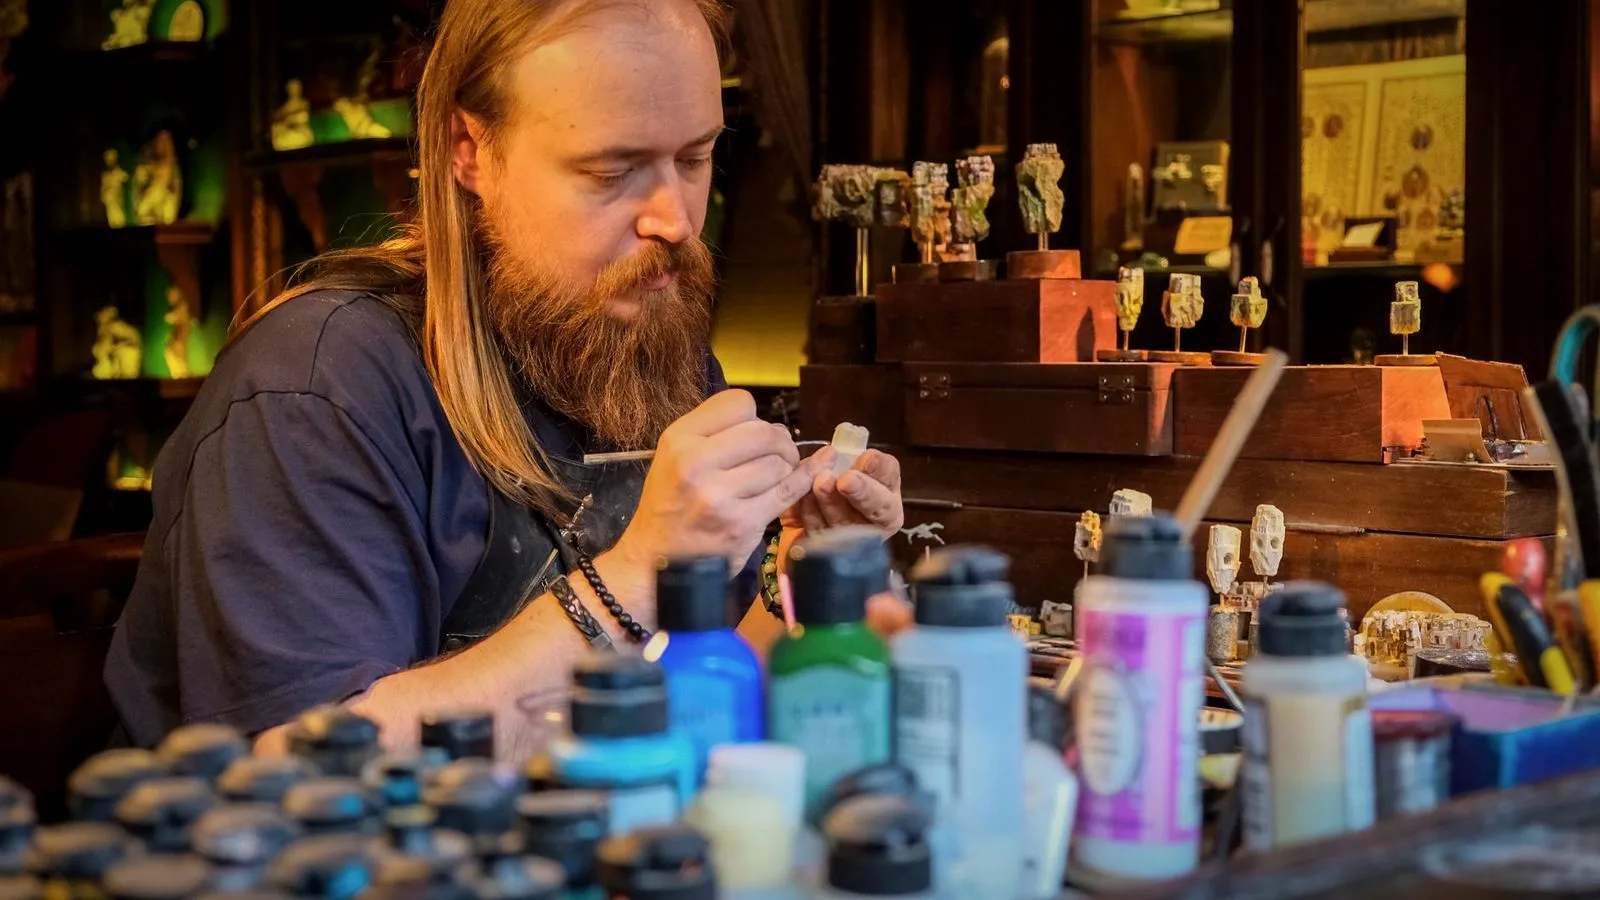
There is no single best paint for 3D prints; there is a best paint for the job in front of you.
| Job | Paint type | Why it fits |
|---|---|---|
| First coat on any print | Spray primer; sandable filler primer to hide layer lines | Gives paint grip and shows flaws |
| Large parts in one color (props, cosplay, covers) | Spray paint rated for plastic | Fast, even coverage |
| Figures and fine detail | Water-based acrylic hobby paint, by brush | Precise, thin coats that preserve detail; cleans up with water |
| Gradients, camouflage, weathering on big pieces | Airbrush with airbrush-ready acrylics | Smooth blends and fine control |
| Glossy color coats on props and parts | Enamel spray or brush paint | Covers in few passes; solvent cleanup |
| Metal look | Metallic paint, or print in metal-filled filament and polish it | Real metal particles take a genuine polish |
| Protection | Clear coat in matte, satin or gloss | Seals paint and sets the final sheen |
Acrylic paint for 3D prints
Water-based acrylic hobby paints are the default for brush work: low odor, easy to thin and easy to clean. They work best over a primer, and a clear coat protects them from handling wear. Buy a small set of primary colors plus black and white before investing in dozens of shades.
Spray paint, airbrush and enamels
Spray cans cover large, smooth areas faster and more evenly than any brush. Enamels such as Rust-Oleum’s 2X Ultra Cover (an acrylic-modified alkyd) are solvent-based and clean up with xylene or mineral spirits instead of water. An airbrush sits in between: it sprays thin, controllable layers, which suits gradients and weathering on larger models.
For a metal finish without paint, consider metal 3D printer filament: prints in metal-filled PLA can be sanded, polished and patinated like the metal they contain.
Spray paint tips for 3D prints
Spray paint rewards patience: distance, thin coats, temperature and humidity all matter. These numbers come from Rust-Oleum’s technical data sheets; other brands differ, so read your can.
- Shake properly: shake the can for one minute after the mixing ball starts to rattle, and shake often while spraying.
- Keep your distance: hold the can 10–16 inches (25–40 cm) from the part and spray in steady, slightly overlapping passes.
- Keep it moving: keep the can in motion while spraying, and start and stop each pass off the part.
- Watch the weather: spray at 50–90 °F (10–32 °C), below 65% humidity for the 2X paint, and away from wind and dust.
- Rotate the part: mount it on a stick, skewer or printed stand so you can reach every side without touching wet paint.
Dry and recoat times
| Rust-Oleum product | Dry to touch | Handle | Fully dry | Next coat |
|---|---|---|---|---|
| 2-in-1 Filler and Sandable Primer | 10 minutes | – | – | Recoat or wet sand once dry; dry sand after 2–4 hours |
| Specialty Plastic Primer | 20–30 minutes | 1 hour | 24 hours | Oil-based topcoat after 1 hour, latex after 4 hours |
| 2X Ultra Cover enamel | 20 minutes | 1 hour | 24 hours | Second coat or clear within 1 hour or after 48 hours |
Times are for about 70 °F (21 °C) and 50% relative humidity, and Rust-Oleum says to allow more time when it is cooler. On plastic, it lists maximum adhesion and durability after 5–7 days, so be gentle with tape, assembly and handling until then.
Painting by material: PLA, PETG, ABS, ASA and resin
| Material | Prep notes |
|---|---|
| PLA | Sand wet to keep it cool; Prusa notes PLA softens above 60 °C (140 °F), so never speed-dry paint with a heat gun |
| PETG | Sands easily wet or dry; smoothing it with solvents is a lab-only process, so rely on filler primer instead |
| ABS and ASA | Sand wet or dry, or smooth with acetone vapor for a glossy surface before painting |
| Resin (SLA/MSLA) | Wash, dry completely and post-cure before sanding or priming; wear gloves until cured |
ABS and ASA need one extra check. Acetone dissolves them, which is what makes acetone smoothing ASA possible, and many spray paints list acetone among their solvents; Rust-Oleum’s 2X does. Build up light coats and test on a scrap part so a heavy wet coat does not soften fine details.
For resin, Formlabs recommends washing in isopropyl alcohol (IPA) or TPM and letting parts dry for at least 30 minutes after an IPA wash, and says to always let prints dry fully before post-curing or post-processing. Prusa’s resin guidance calls for gloves whenever you handle uncured resin.
Safety: ventilation, respirators and sanding dust
Paint and primer fumes, solvent vapors and fine dust are the main hazards when you paint prints.
- Ventilation: Rust-Oleum’s data sheets and safety data sheet say to use its sprays only outdoors or in a well-ventilated area. For spray painting parts, NIOSH’s workshop guidance points to ventilated containment.
- Fire: aerosol paints are extremely flammable, per the SDS. Keep them away from flames and heaters, and store cans below 50 °C (122 °F).
- Respirators: the SDS names a NIOSH/MSHA-approved air-purifying respirator with organic vapor cartridges where vapor levels can exceed exposure limits. A dust mask stops particles, not solvent vapor.
- Eyes and skin: wear safety glasses for sanding and spraying, as NIOSH advises, and impervious gloves for paint and solvents, as the SDS advises.
- Sanding dust: sand wet where you can, clean up by wet wiping or with a HEPA vacuum, and do not dry sweep or blow dust off with compressed air, per NIOSH.
- Solvents: NIOSH notes that acetone irritates the eyes and airways, and that solvent vapors can create an explosion hazard in poorly ventilated spaces. Keep only small amounts open.
Keep children and pets out of the painting area until everything is dry and cleaned up. If you are still choosing a project to practice on, our list of 3D print ideas has plenty of simple, paintable models.
The bottom line
Painting a 3D print is mostly preparation: sand in grit steps, fill layer lines with filler primer or putty, clean, prime thin, then build color in light coats and seal it. Choose spray paint for big even surfaces, acrylics for detail and an airbrush for blends. Follow the dry times on the can, give plastic days to reach full adhesion, and paint only with good ventilation and the right protection.
Sources
- Rust-Oleum technical data sheets: Painter’s Touch 2X Ultra Cover enamel, 2X Ultra Cover clear, Specialty Plastic Primer spray, 2-in-1 Filler and Sandable Primer, Filler Primer and the 2X Ultra Cover safety data sheet (surface prep, spray distance, conditions, dry and recoat times, 5–7 days on plastic, 320–400 grit, solvents, ventilation, respirator, flammability)
- Prusa Knowledge Base: PLA, PETG, ASA, ABS and Resins (wet sanding PLA, PLA softening above 60 °C, PETG smoothing lab-only, acetone smoothing ABS and ASA, gloves for resin)
- Formlabs support: SLA basic finishing (IPA or TPM wash, at least 30 minutes drying, dry fully before post-curing or post-processing)
- colorFabb: bronzeFill technical data sheet (sanding sequence 120–180, 240–320, 600 grit or finer)
- NIOSH: Approaches to Safe 3D Printing, publication 2024-103 (eye protection, ventilated containment for spray painting, wet cleaning and HEPA vacuums, acetone and solvent hazards)