A good 3D printer table is heavy, rigid and level, with a top larger than the printer’s footprint plus working room, a load rating well above the printer and spools, an outlet within easy reach and space to vent fumes. A 256 mm enclosed printer weighs about 13–15 kg; a 350 mm enclosed machine weighs over 30 kg.
That jump in size is why the table matters more than it used to. Today’s fast enclosed printers are bigger and heavier than older open frames, and our guides to enclosed 3D printers and large 3D printers show how quickly footprints grow. This guide uses manufacturer spec pages to size a table, stand or desk, then covers vibration, power, ventilation and fire safety.
The short answer
- Stable and level: a braced table that does not rock when you push a corner. Prusa suggests a workbench; Bambu Lab asks for a stable, sturdy surface.
- Big enough: the printer’s footprint plus working room. Bambu Lab recommends 700 × 700 mm for the H2D; Prusa asks for 30 cm of free space around the CORE One.
- Strong enough: rated for the printer, any filament unit and full spools, with margin.
- Power and air: an easy-to-reach outlet, no overloaded power strip and a ventilated spot away from where people sit.
- Storage: a lower shelf or drawers for spools, tools and spare parts, kept dry.
What makes a good 3D printer table?
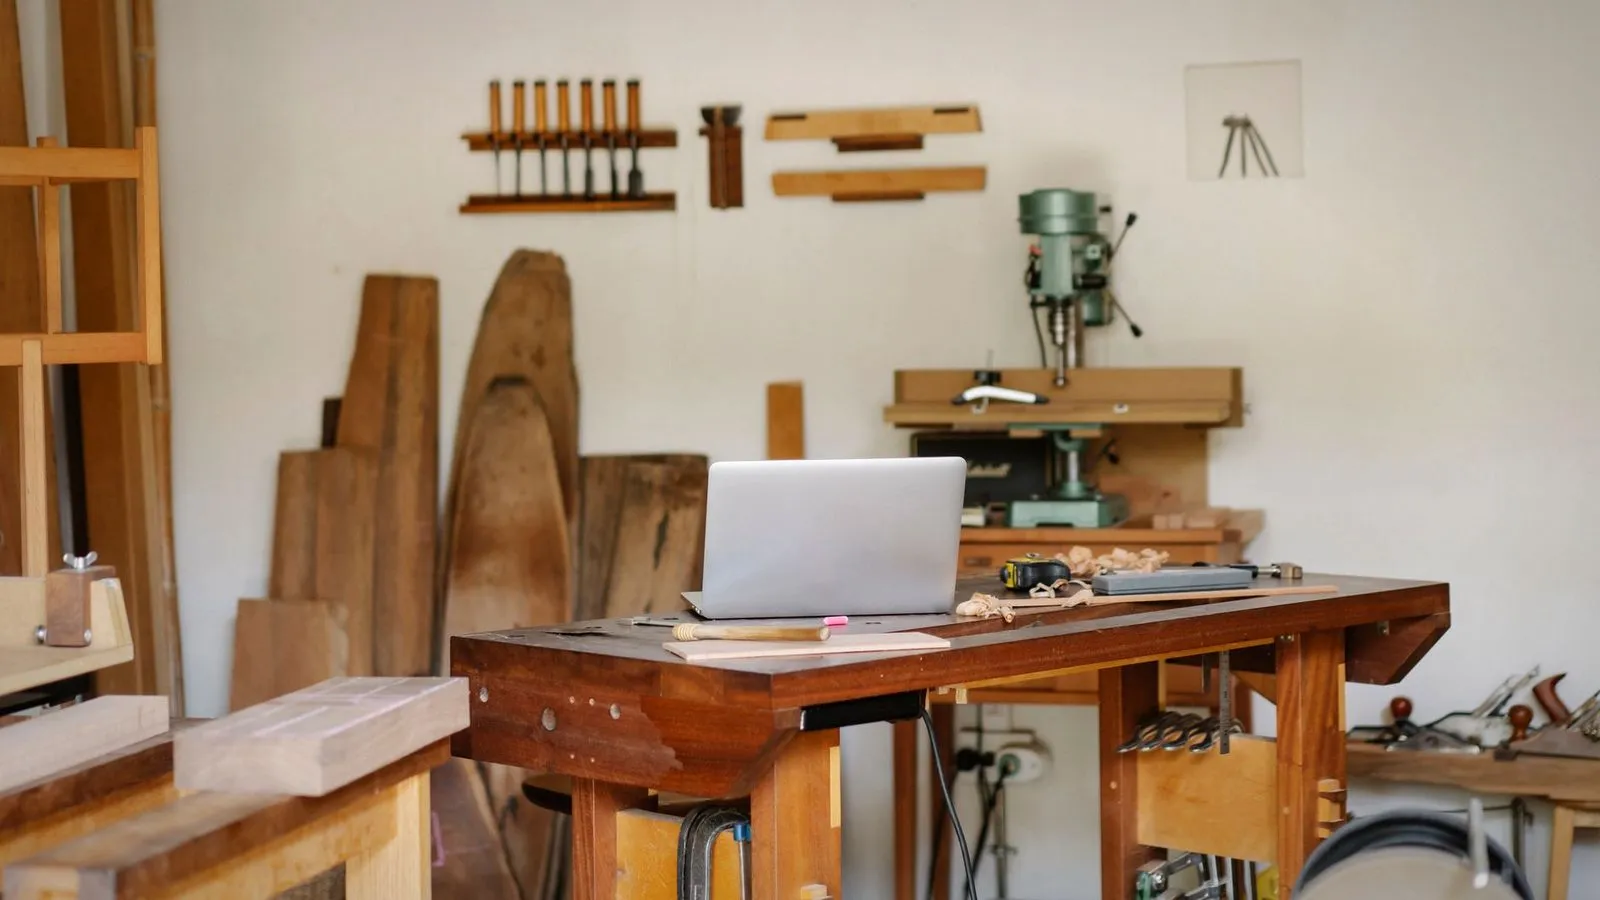
A good 3D printer table holds the printer still, level and at a comfortable height for loading filament and watching the first layer. Fast printers move heavy print heads back and forth, and that motion pushes on whatever they stand on.
Manufacturers spell out why a solid base matters. Prusa’s CORE One handbook says the surface must be level and stable, ideally a workbench, and warns that an unstable surface, or another printer running next to it, can affect the accuracy of its self-test calibration. Bambu Lab’s H2D manual asks for a stable, sturdy surface so the printer cannot shift or fall, and says to calibrate only after the printer is in its final spot.
Vibration and anti-vibration feet
Many printers ship with soft feet, and they protect the table more than the print. Bambu Lab says the H2D’s soft pads reduce the vibration passed to the desk and to neighboring machines, and that the printer body may visibly rock on them without affecting print quality. Print artifacts such as ringing come from the printer’s own resonance, which our guide to input shaping in 3D printing explains; a table that sways still makes calibration harder.
Bed-slinger printers need extra thought. On Bambu Lab’s A1, the bed moves back and forth to cover the Y axis, so leave free space in front of and behind the printer and check that the table does not rock front to back.
How to choose a 3D printer table: buying checklist
A 3D printer table is right when it passes seven checks: size, working room, load, rigidity, stability, power and air, and storage. Use them whether you buy a ready-made 3D printer stand, a workbench or build your own:
- Measure the printer from the maker’s spec page, including any filament unit that sits on top or beside it.
- Add working room on the sides and front for the door, the spool path and your hands.
- Add the load: printer, filament unit, full spools and anything stored on the lower shelf.
- Check rigidity: cross-bracing or a solid back panel, a thick top and adjustable feet for leveling.
- Lock it down: if it has casters, they must lock, and the table should not roll or twist when the print head moves.
- Plan power and air: an outlet within reach and a route for fumes or an exhaust hose.
- Plan storage: a dry spot for spools and a drawer for tools.
3D printer table size: footprint, weight and height
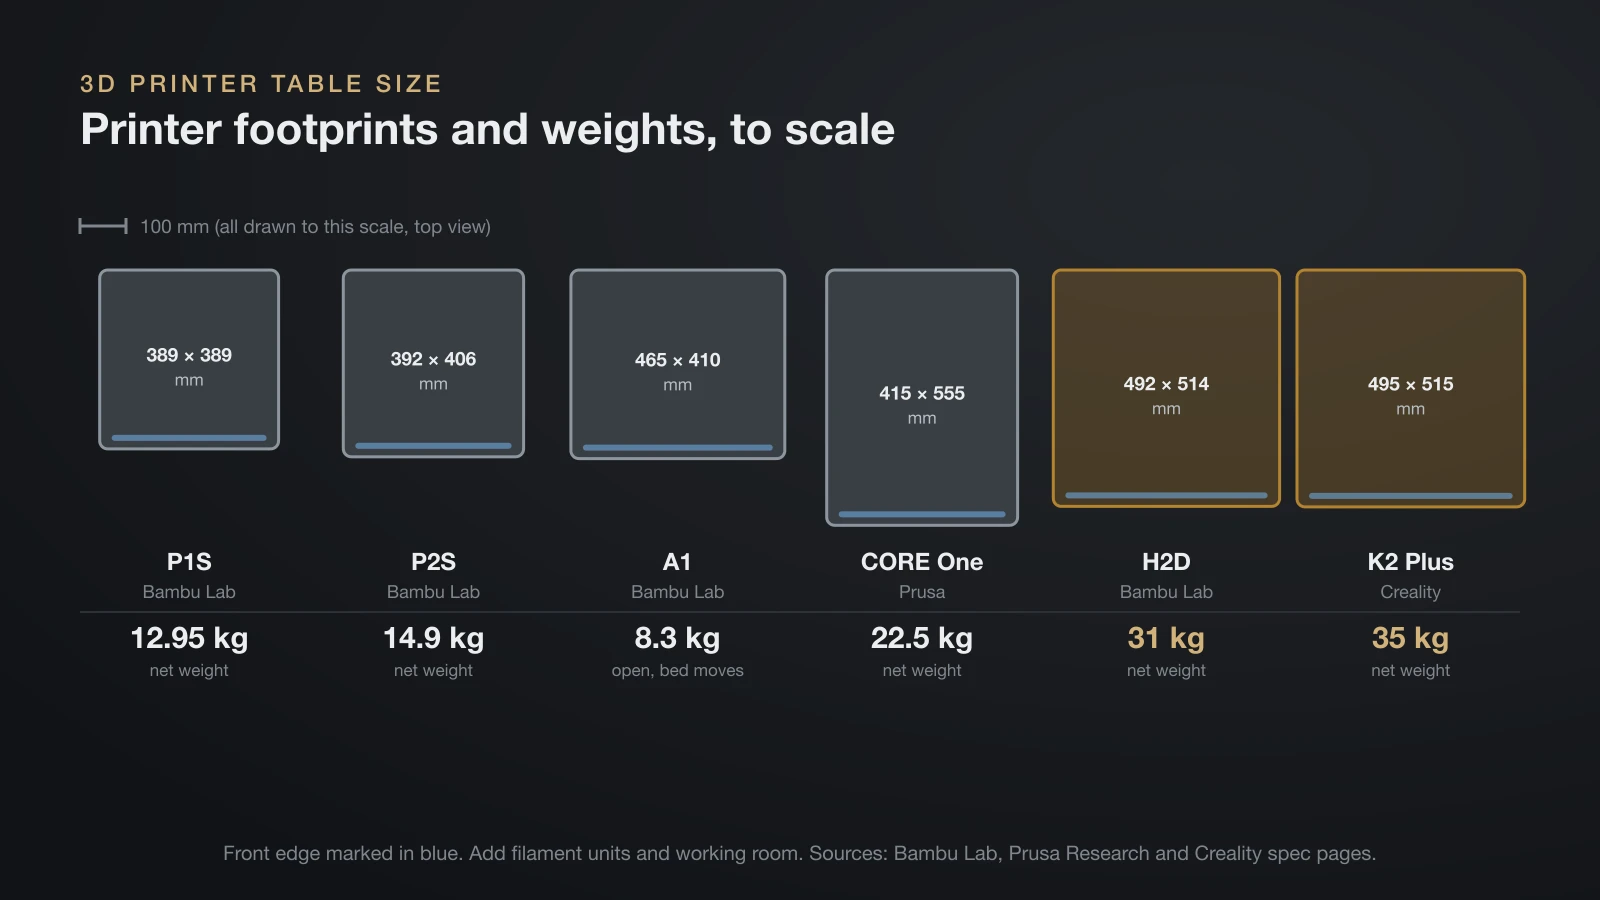
The right table size starts with the printer’s own dimensions, which vary far more than build volumes suggest. The table lists manufacturers’ figures for popular printers.
| Printer | W × D × H (mm) | Net weight | Max power |
|---|---|---|---|
| Bambu Lab A1 (open, bed moves) | 465 × 410 × 430 | 8.3 kg | 350 W at 110 V |
| Bambu Lab P1S | 389 × 389 × 458 | 12.95 kg | 350 W at 110 V |
| Bambu Lab P2S | 392 × 406 × 478 | 14.9 kg | 1,000 W at 110 V |
| Prusa CORE One | 415 × 555 × 555 | 22.5 kg | 2.8 A max |
| Bambu Lab H2D | 492 × 514 × 626 | 31 kg | 1,320 W at 110 V |
| Creality K2 Plus | 495 × 515 × 640 (916 with CFS on top) | 35 kg | 1,200 W rated |
How much table space you need
Clearance needs differ by maker, so check yours. Bambu Lab recommends a 700 × 700 × 1,100 mm space for the H2D, about 10 cm around a 492 × 514 mm machine. Prusa is stricter: at least 30 cm of free space around the CORE One, because obstructions can wear cables and affect operation. It also needs at least 360 mm of clearance in front to open the door fully.
Filament units need their own space, beside the printer or on top of it. Bambu Lab’s AMS 2 Pro measures 372 × 280 × 226 mm and its single-spool AMS HT 114 × 280 × 245 mm, so measure where yours will sit before choosing the top. Leave access to the back, where most printers take their power cord, spool holder and filament tubes.
Weight the table must carry
Add everything the top will carry, not just the printer. An H2D with one AMS 2 Pro and four full 1 kg spools comes to about 37.5 kg before the empty spools (estimate: 31 + 2.5 + 4 × 1 kg). A Creality K2 Plus with its 4.56 kg CFS unit and four spools reaches about 43.6 kg on the same basis.
Choose a table whose rated load clearly exceeds that total, and count the lower shelf separately if it holds spare filament. Weights vary widely: the open-frame A1 weighs 8.3 kg and the H2D 31 kg, so a table chosen for one may not suit the other.
Height and top clearance
Height affects comfort and access as much as stability. Pick a height where you can see the first layer and reach the nozzle area without crouching, and leave headroom above the printer for lids, top-mounted filament units and airflow. The Creality K2 Plus grows from 640 to 916 mm tall with its CFS on top, and Bambu Lab’s recommended space for the H2D allows 1,100 mm of height.
3D printer stand vs table vs desk vs shelf
A 3D printer stand, a workbench, a desk and a shelf can all work, but each suits a different printer size and setup. The variants people search for, from a 3D printer desk to a printer station, come down to these five types:
| Option | Good for | Watch for |
|---|---|---|
| Dedicated 3D printer stand or cart | One printer with storage below | Locking casters, top size, rated load per shelf |
| Workbench | Large or heavy printers, tools and finishing work | Depth for door swing and rear access |
| Shared desk | Small, light printers | Vibration at your monitor, fumes where you sit |
| Wall shelf | Small printers only | Bracket rating, top clearance, rear access |
| Rack for several printers | Two or more machines | Ventilation and power planning |
For racks, NIOSH describes an enclosed shelving unit with clear doors and an exhaust fan venting outdoors, and it advises planning the electrical supply instead of relying on power strips.
Power, ventilation and fire safety around a 3D printer table
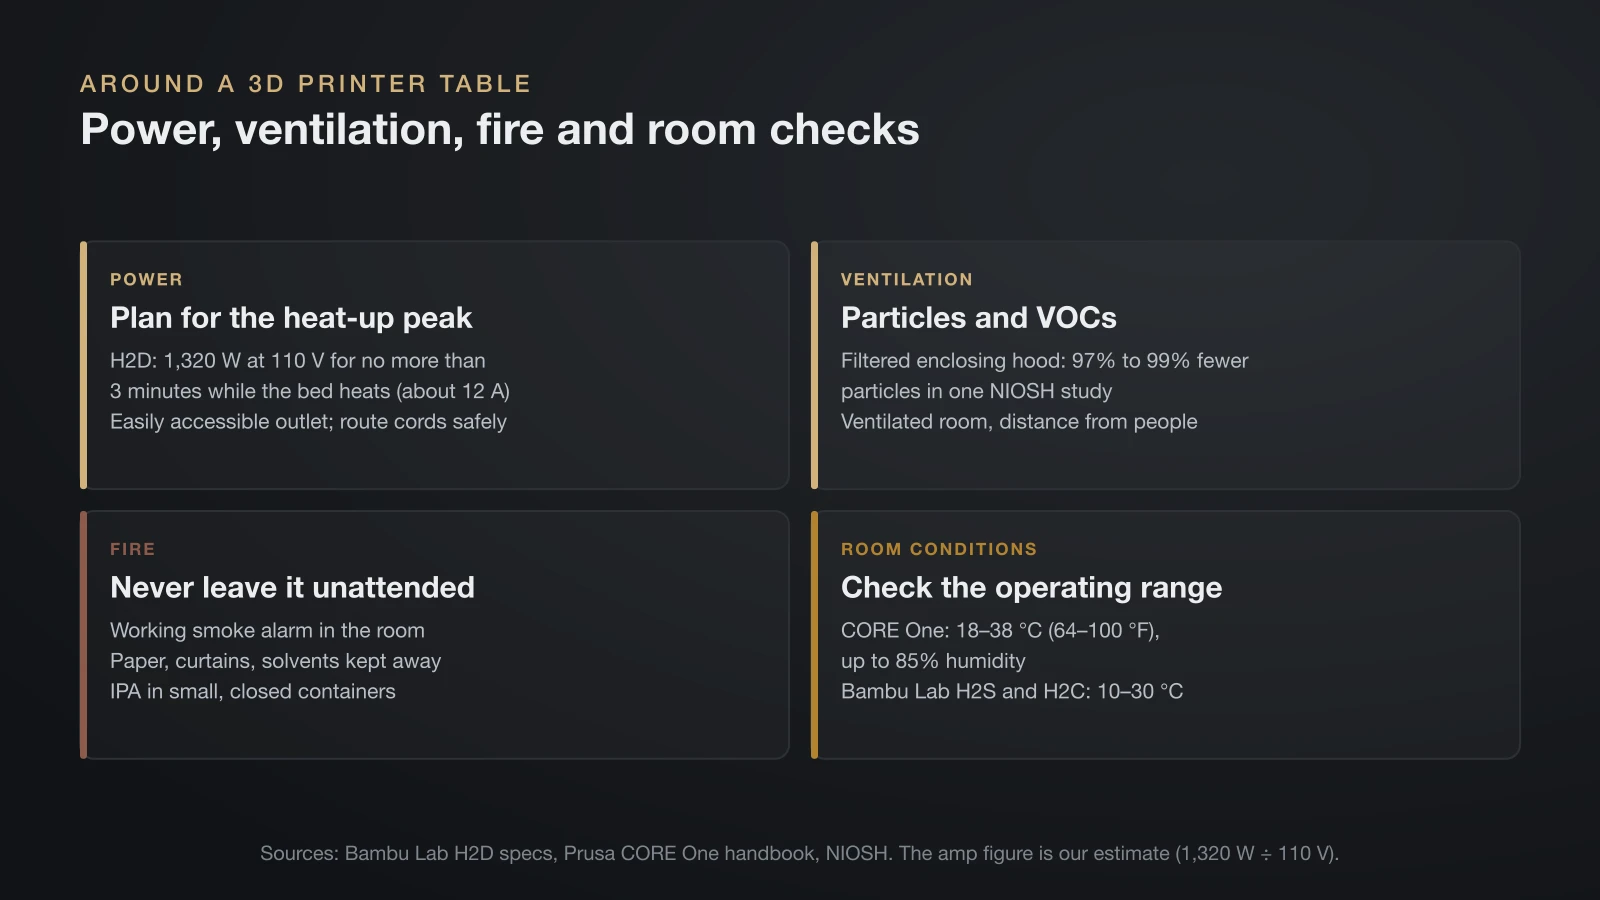
A 3D printer table should sit where power, fresh air and fire safety are easy to manage. The printer heats a nozzle and bed for hours, often while you are elsewhere.
Power. Large printers draw much more while heating than while printing: Bambu Lab lists 1,320 W at 110 V for the H2D, but says full power lasts no more than 3 minutes while the bed heats. That is about 12 amps (estimate: 1,320 W ÷ 110 V), so check what else shares the circuit before adding a second large printer. Prusa asks for an easily accessible outlet and cords routed where nobody trips over them.
Ventilation. Printers release ultrafine particles and volatile organic compounds. NIOSH reports that a filtered enclosing hood cut particle emissions by 97% to 99% in one study, and it recommends keeping as much distance as possible between printers and people. Place the table in a ventilated room, not beside your chair, and leave space behind it for an exhaust hose if your printer has one.
Fire. Prusa warns not to leave a running printer unattended, and NIOSH lists fire detection and clearance from combustibles among its controls. Keep paper, curtains and solvent bottles away from the printer, keep solvent bottles such as isopropyl alcohol closed and away from the printer, and fit a working smoke alarm in the room.
Room conditions. Operating ranges are narrower than many garages: 18–38 °C (64–100 °F) and up to 85% humidity for the CORE One, and 10–30 °C for Bambu Lab’s H2S and H2C.
Storage under and around the table
The space under a 3D printer table is the natural home for filament, tools and spare parts. A lower shelf keeps heavy spools low, which also helps stability.
Keep filament dry rather than simply out of the way: many materials absorb moisture from the air, so use sealed boxes with desiccant. Our guide to filament storage covers target humidity and drying. A drawer for scrapers, nozzles, snips and glue sticks saves trips across the room; see our list of 3D printer accessories for what is worth keeping close.
DIY vs bought 3D printer table
Both routes work if the result is rigid, level and rated for the load. A bought stand saves time and often adds storage, but check the maker’s load rating per shelf and the top size against the printer’s spec, not the product photo.
A DIY bench lets you match the top to your exact printer and add room for tools. Use a thick, solid top, brace the frame against racking, fit adjustable feet and check the top with a level before calibrating the printer. Avoid lightweight hollow-core tables and thin wire shelving for large printers: they flex under the moving print head.
If you are choosing the printer first, our guide to the Bambu H2D shows how much space one large dual-nozzle machine really needs.
The bottom line
The best 3D printer table is the one that does not move: rigid, level and rated well above the printer, its filament unit and spools. Size it from the maker’s spec page, not the build volume, and add clearance for doors, cables and air. Put it on an easy-to-reach outlet in a ventilated room with a smoke alarm, and keep filament dry on the shelf below.
Sources
- Bambu Lab US Store: H2D and spec sheet, A1, P1S, P2S spec sheet, H2S spec sheet, H2C spec sheet, AMS 2 Pro, AMS HT
- Bambu Lab: H2D User Manual V1.0; Wiki: H2D FAQ, Time-lapse on the A series, power parameters
- Prusa Research: Prusa CORE One handbook
- Creality: K2 Plus Combo specifications
- NIOSH (CDC): Approaches to Safe 3D Printing, publication 2024-103