To edit STL files, match the tool to the change. Your slicer can scale, cut, add text and subtract holes, while a mesh editor such as Meshmixer or Blender handles sculpting, merging and repairs. For precise redesigns, Fusion or FreeCAD can convert the mesh into a solid. An STL has no design history, so big changes often mean remodeling.
An STL is the output of a design, not the design itself, a bit like a PDF compared with the document that produced it. If you are starting a part from scratch, read our guide on how to make 3D models for printing instead; this guide is for files you already have.
The short answer
| What you want to change | Easiest tool | How |
|---|---|---|
| Size | Any slicer | Scale tool, uniform or per axis |
| Split a model or print part of it | PrusaSlicer, Bambu Studio | Cut tool, optionally with connectors |
| Add text or a logo | PrusaSlicer, Bambu Studio | Text tool: raised or engraved |
| Add a hole or a recess | PrusaSlicer, Bambu Studio | Negative volume or negative part |
| Merge or subtract whole models | Bambu Studio, Meshmixer, Blender | Mesh boolean |
| Fix errors (holes, flipped faces) | Slicer auto-repair, Meshmixer | Repair or “make solid” |
| Sculpt or reshape | Blender, Meshmixer | Mesh sculpting tools |
| Change exact dimensions | Fusion, FreeCAD | Convert mesh to solid, then model |
What is an STL file, and why is it hard to edit?
An STL file describes only the surface of a model as a mesh of triangles. The University of Maryland’s fab lab guide notes that STLs carry very little extra information, and the most important omission is units: every measurement is unitless. There is no color, no material and no record of how the model was built.
In CAD, a hole is a feature with a diameter you can type in. In an STL, the same hole is just a ring of flat triangles. Editing geometry in an STL or 3MF is called mesh editing, and it suits some jobs far better than others.
| Mesh (STL) | Solid CAD (STEP, native CAD) | |
|---|---|---|
| Made of | Flat triangles | Exact surfaces, including true curves |
| History | None | Features and dimensions you can change |
| Units | Not stored | Stored |
| Easy edits | Scaling, cutting, sculpting, adding shapes | Changing any dimension or feature |
| Hard edits | Changing a hole size or wall thickness exactly | Organic sculpting |
Before you edit anything, check whether the designer published the original CAD or STEP file. Changing a dimension there is a quick edit; on a mesh it can mean rebuilding the whole feature.
Which tool should you use to edit STL files?
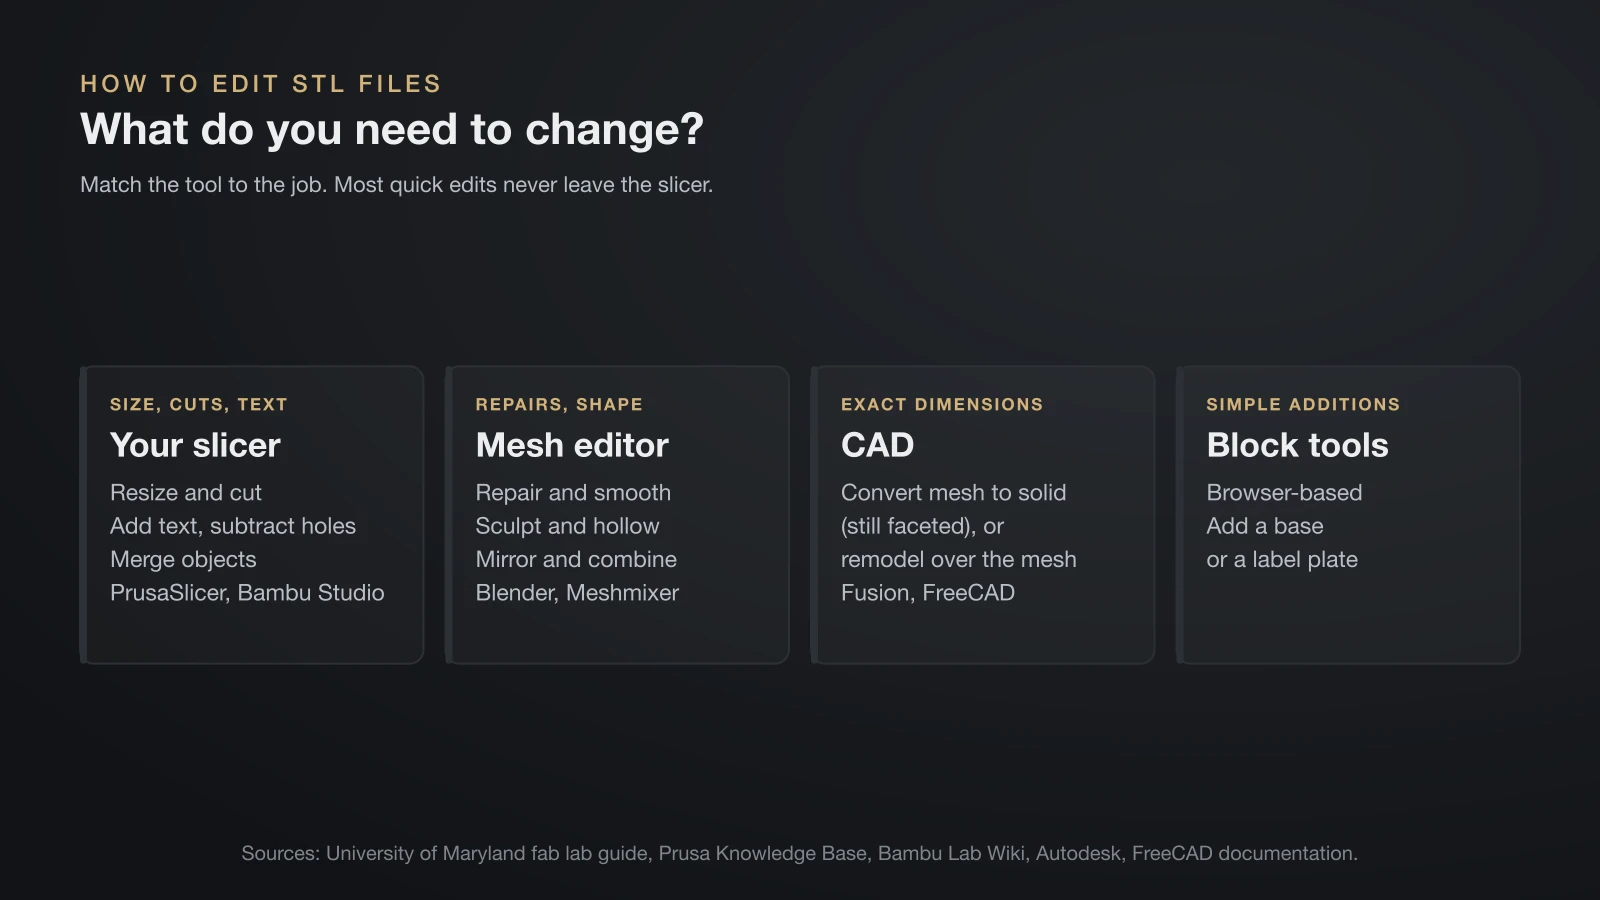
The University of Maryland guide sums it up: slicers such as Bambu Studio and PrusaSlicer provide basic mesh editing, and free programs like Blender and Meshmixer handle more complex work. For dimension-driven changes, CAD takes over.
- Slicer: resize, cut, add text, subtract holes and merge objects.
- Mesh editor: repair, sculpt, smooth, hollow, mirror and combine models.
- CAD: convert the mesh into a solid for exact holes and walls, or remodel the part using the mesh as a reference.
- Block-based browser tools: fine for adding simple shapes, such as a base or a label plate.
How to edit STL files in your slicer
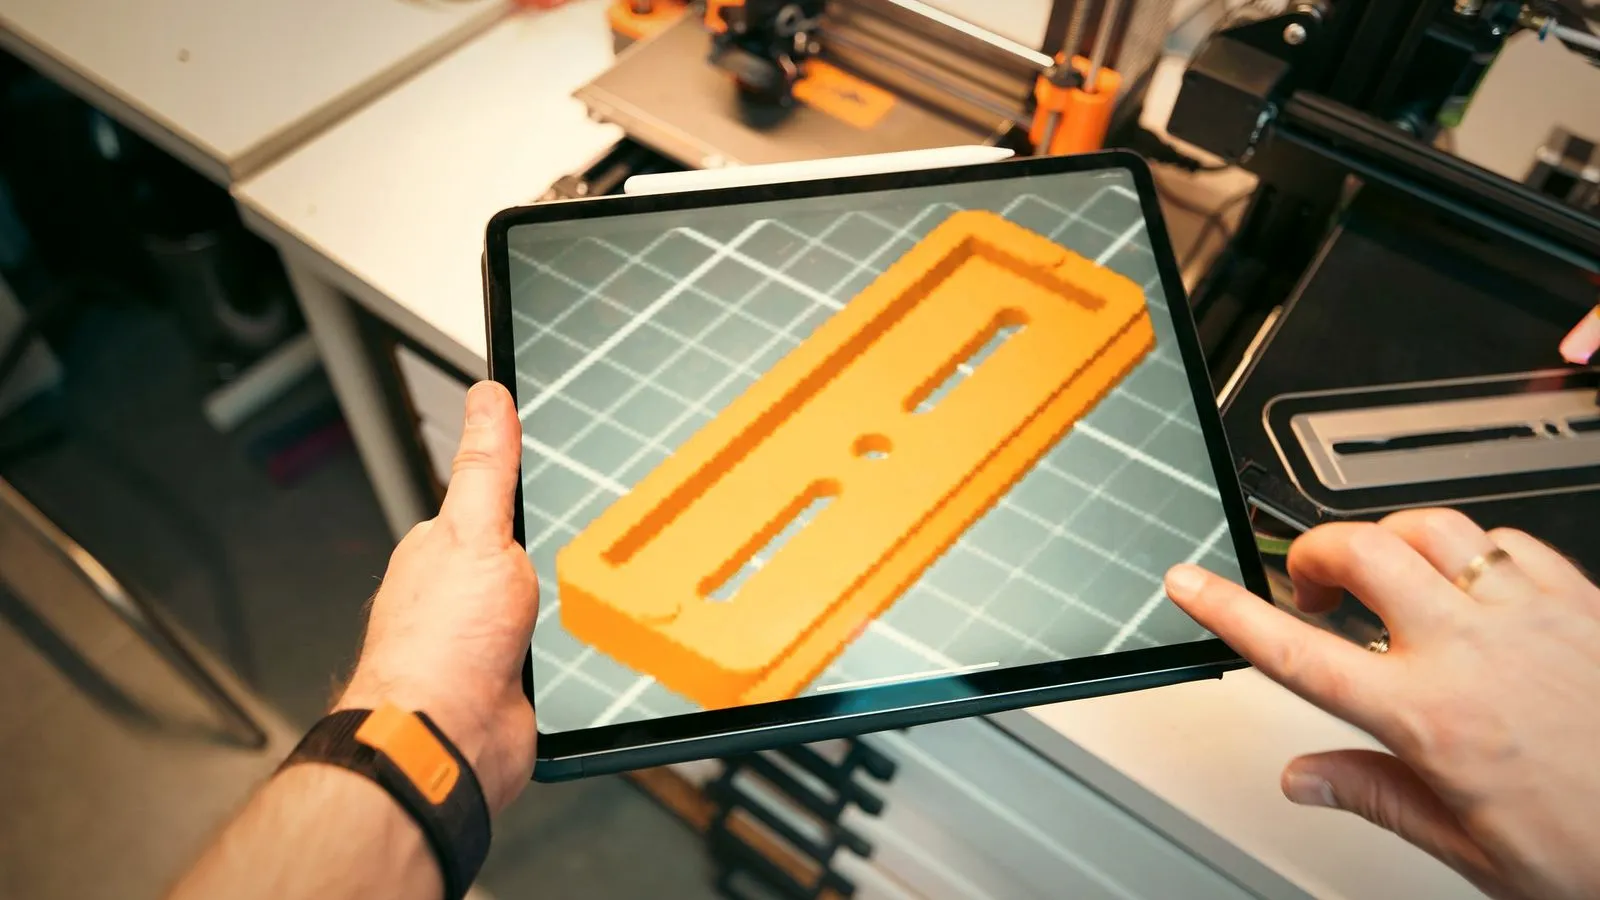
The steps below follow PrusaSlicer and Bambu Studio; other slicers have similar tools. Once the edit is done, the same slicer turns the STL into G-code.
Resize an STL
Select the model and use the scale tool. Uniform scaling keeps proportions, while unlocking it stretches one axis. Scaling changes every dimension, including holes and clearances, so a part that fits a screw or shaft will stop fitting; check fits with the tolerance test from our 3D printer calibration guide. If a model imports tiny or huge, the designer probably worked in other units, and scaling it back is the right fix.
Cut or split a model
In PrusaSlicer, select the object and press C. You can cut at any angle, choose which pieces to keep and add connectors (a plug, a separate dowel pin or a snap fit), or cut a dovetail. Bambu Studio’s cut tool offers planar and dovetail modes too. Cutting lets you print a model bigger than your bed, print only part of it, or orient each half for strength.
Add text or a logo
PrusaSlicer’s text tool (press T) places text on flat or curved surfaces and either adds it as a new raised part or subtracts it as a negative volume, which engraves it. Bambu Studio’s text shape works the same way, with a mode that wraps text around curved surfaces and one that only changes color where the text overlaps the model. PrusaSlicer’s SVG tool does the same with vector graphics, which is the easiest way to put a logo or QR code on a part.
Add a hole or recess
Add a negative volume (PrusaSlicer) or negative part (Bambu Studio), such as a cylinder, and position it where you want the hole. Bambu Lab notes that its negative part is only subtracted during slicing and does not change the model’s geometry, so you cannot export an STL with the hole in it. If you need the edited file, use a mesh boolean instead.
Merge or subtract whole models
Bambu Studio’s mesh boolean tool offers union, intersection and subtraction. Subtraction works as A minus B: the first object stays and the overlapping part of the second is removed. Unlike a negative part, the result is real geometry you can export.
Editing STL files in a mesh editor
When a slicer is not enough, a mesh editor gives you direct control over the triangles.
Meshmixer is Autodesk’s free “Swiss Army knife” for meshes: plane cuts, mirroring, booleans, hole filling, auto-repair, convert-to-solid, hollowing and measurements. Autodesk says it is no longer in development and will not be supported, though it has no current plans to retire it, and it points users to Fusion’s mesh tools. It still works for quick jobs, but expect no updates.
Blender is free, open source and far more powerful. Import an STL through File, Import, STL, where you can set the scale and apply the scene’s units, and let the importer validate the mesh. It has the steepest learning curve here, so it pays off mainly for sculpting and artistic work.
Repair a broken STL
Many downloaded models have small errors: holes in the surface, flipped triangles or overlapping shells. PrusaSlicer and Bambu Studio repair models automatically to a certain degree, and Bambu Studio can use Microsoft’s Netfabb-based repair on Windows. Bambu Lab also warns that the slicer only detects some errors, so a model can still slice wrong without any warning.
For stubborn files, Meshmixer’s auto-repair is easy, and its “make solid” function almost always works, at the cost of some resolution. If a part slices with missing walls or odd gaps, repair it before you edit anything else.
Converting STL to STEP (and STEP to STL)
Converting an STL to STEP lets you open it in CAD as a solid. It does not bring back the original design: the triangles become faces of the solid, so curves stay faceted and there is still no feature history.
In Autodesk Fusion
- Insert the STL as a mesh.
- In the Design workspace, open the Mesh tab and choose Modify, then Convert Mesh.
- Pick a method. Faceted turns every mesh face into a face of the new body. Prismatic merges groups of faces into single faces, which suits parts originally made in CAD.
- Choose Parametric to keep the conversion in the timeline, or Base Feature to skip history.
- Export the result as STEP if you need it in another program.
A third method, Organic, is part of the Fusion Design Extension. Repair holes in the mesh first so it converts to a clean solid.
In FreeCAD (free)
- Import the STL and, if needed, analyze and repair it in the Mesh workbench.
- In the Part workbench, choose Part, then Create shape from mesh.
- Optionally run Refine shape to remove needless edges between flat faces, then Part, Convert to solid.
- Export as STEP.
FreeCAD’s documentation warns that a scanned mesh can contain thousands of triangles, and a solid with the same number of faces is very hard to work with. Conversion works best on simple, low-poly parts.
What conversion can and can’t do
| Can | Can’t |
|---|---|
| Give you a solid body you can cut, extrude and add features to | Recreate true arcs, fillets or splines |
| Let you add new, exact features next to the old geometry | Restore the designer’s feature history |
| Let you measure and reference faces | Fix a mesh with holes without repair first |
Going from STEP to STL is easy: CAD programs export STL or 3MF, and PrusaSlicer opens STEP files directly, triangulating them on import. Online converters work too, but don’t upload files you aren’t allowed to share.
How to open STL files on Windows, Mac and in a browser
Opening an STL to look at it got harder on Windows. Microsoft has retired its built-in 3D apps:
| Microsoft app | Status |
|---|---|
| 3D Builder | No longer supported and removed from the Microsoft Store as of July 2024 |
| Paint 3D | Deprecated in August 2024, removed from the Microsoft Store on November 4, 2024 |
| 3D Viewer | Deprecated in February 2026, removed from the Microsoft Store on July 1, 2026; existing installs keep working |
3D Viewer was never preinstalled on Windows 11. Microsoft suggests Babylon.js Sandbox for viewing 3D content: a free browser viewer that opens STL, OBJ and glTF files, and can be installed as an app that opens STL files on double-click.
On any system, including Mac and Linux, the most useful viewer is a free slicer such as PrusaSlicer, Bambu Studio, OrcaSlicer or UltiMaker Cura, because it shows whether the model will print.
How to convert an image to an STL file
A photo cannot become a full 3D object, but it can become a relief or a lithophane, a thin panel whose thickness varies so the image appears when lit from behind. UltiMaker Cura opens JPG, PNG, BMP and GIF files directly and asks how to convert them:
- Height and base: the maximum relief height and the thickness of the base plate, in mm.
- Width and depth: the footprint on the build plate.
- Darker is higher: the setting for lithophanes, so dark areas become thick and block light. Lighter is higher suits height maps and terrain.
- Color model: Linear for height maps, Translucency for lithophanes.
For logos and line art, trace the image as an SVG and add it with PrusaSlicer’s SVG tool, or extrude it in CAD. You can also turn a Minecraft build into an STL with a dedicated exporter, covered in our guide to Minecraft 3D prints.
Tips to avoid problems after editing
- Keep the original. Save edits under a new name, and save slicer projects as 3MF so edits and settings stay together.
- Check scale after every import, since an STL stores no units.
- Look at the layer preview. Missing walls or mid-air islands point to an error the edit introduced.
- Respect the license. Some model licenses forbid selling prints; our list of 3D print ideas explains where to find models and what to check.
The bottom line
Edit STL files with the lightest tool that does the job: the slicer for size, cuts, text and holes; Meshmixer or Blender for repairs and sculpting; Fusion or FreeCAD when you need an editable solid. Converting to STEP gives you a solid, not the original design, so ask for the source CAD file whenever a model needs real dimensional changes. To simply view an STL on Windows today, use a free slicer or the Babylon.js Sandbox, since Microsoft’s 3D apps are gone from the Store.
Sources
- Microsoft Learn: Deprecated features for Windows client and Resources for deprecated features (3D Builder, Paint 3D and 3D Viewer dates), with the Babylon.js documentation: Sandbox (STL support, installable viewer)
- Autodesk: Meshmixer (tools, development status) and Fusion Help: Convert a mesh body to a solid body (Convert Mesh methods)
- Slicer documentation: Prusa Knowledge Base Cut tool, Text tool, SVG embossing tool, Corrupted 3D models and Supported file formats; Bambu Lab Wiki Negative Part, Mesh boolean and Fix Model; UltiMaker Cura image reader plugin
- Open-source documentation: FreeCAD Part ShapeFromMesh, Part RefineShape and Mesh to Part; Blender Manual STL import and export
- University of Maryland: Slicing and 3D Printing File Types Overview (unitless STL meshes, mesh editing tools)