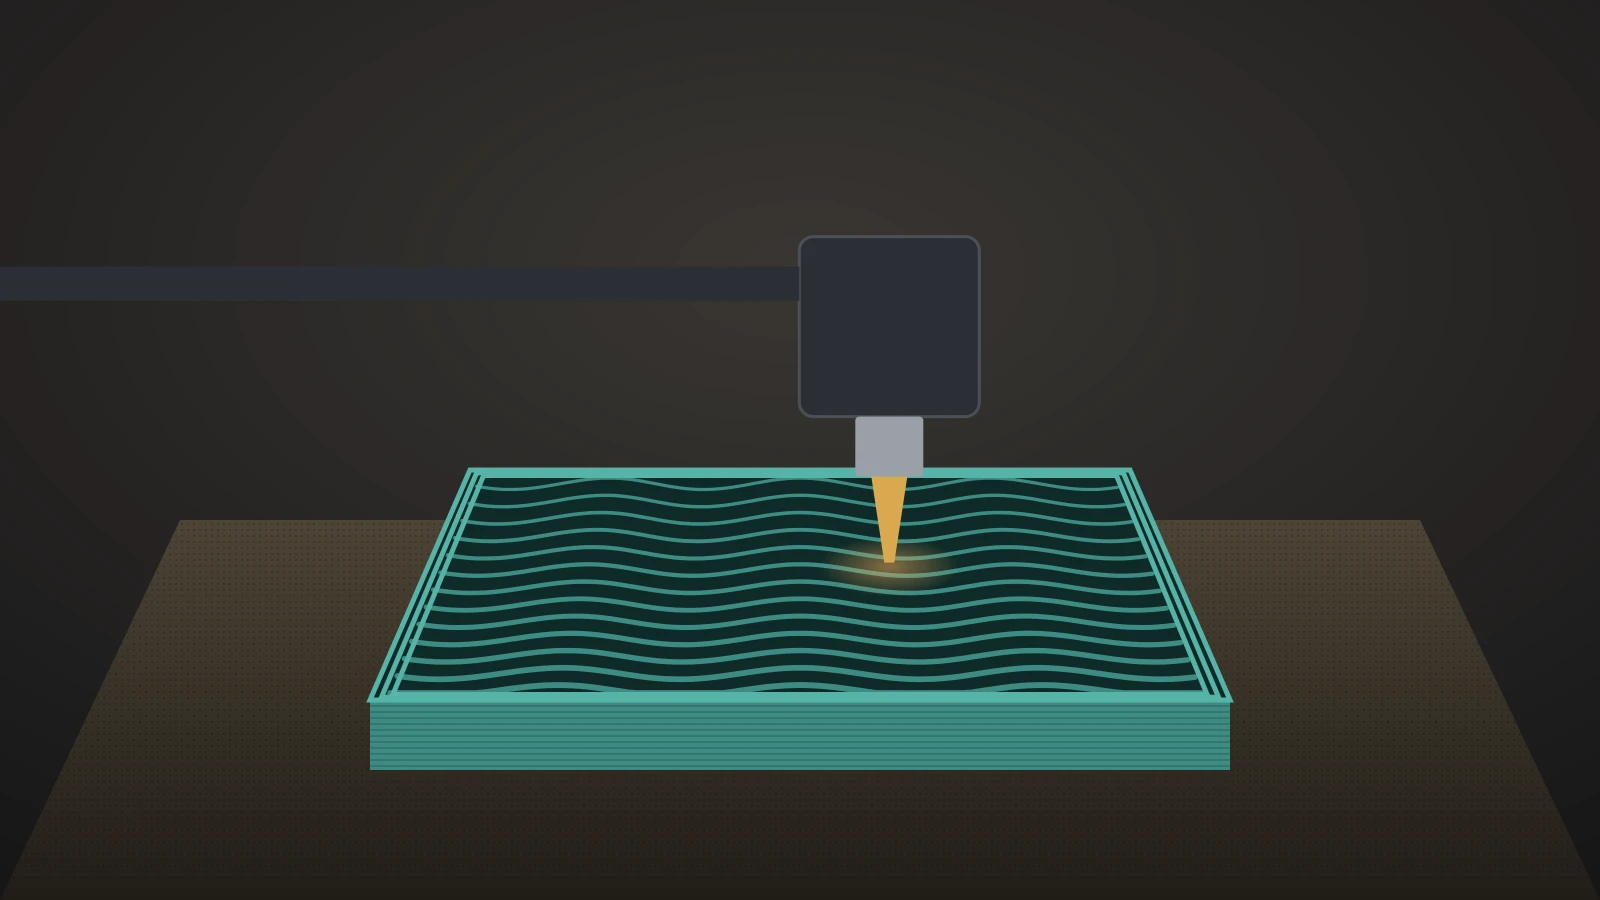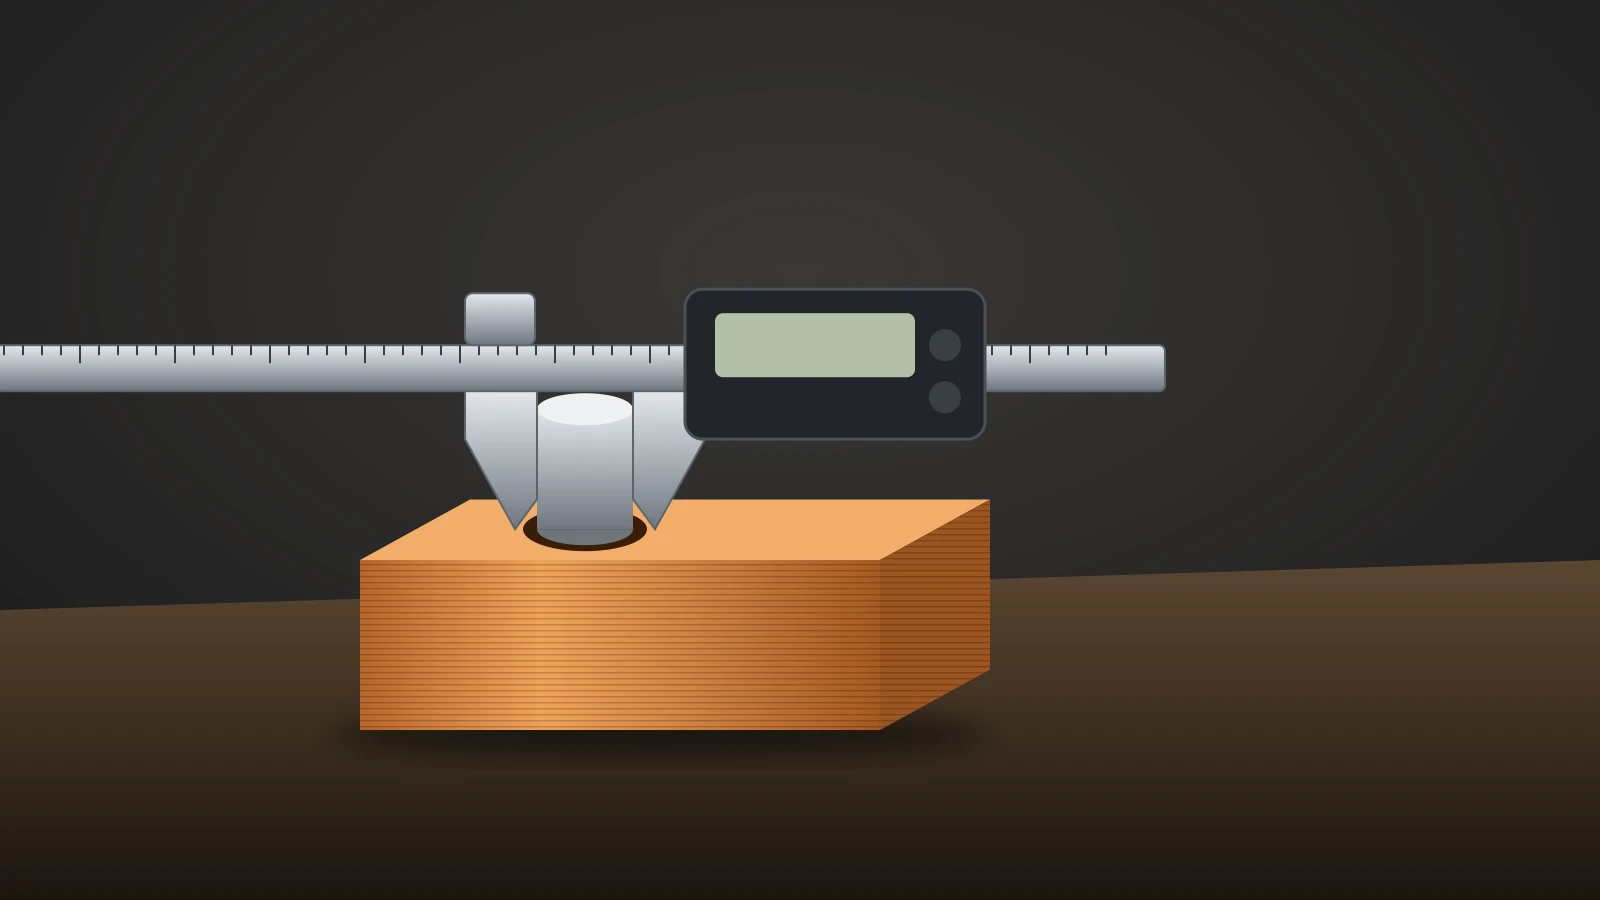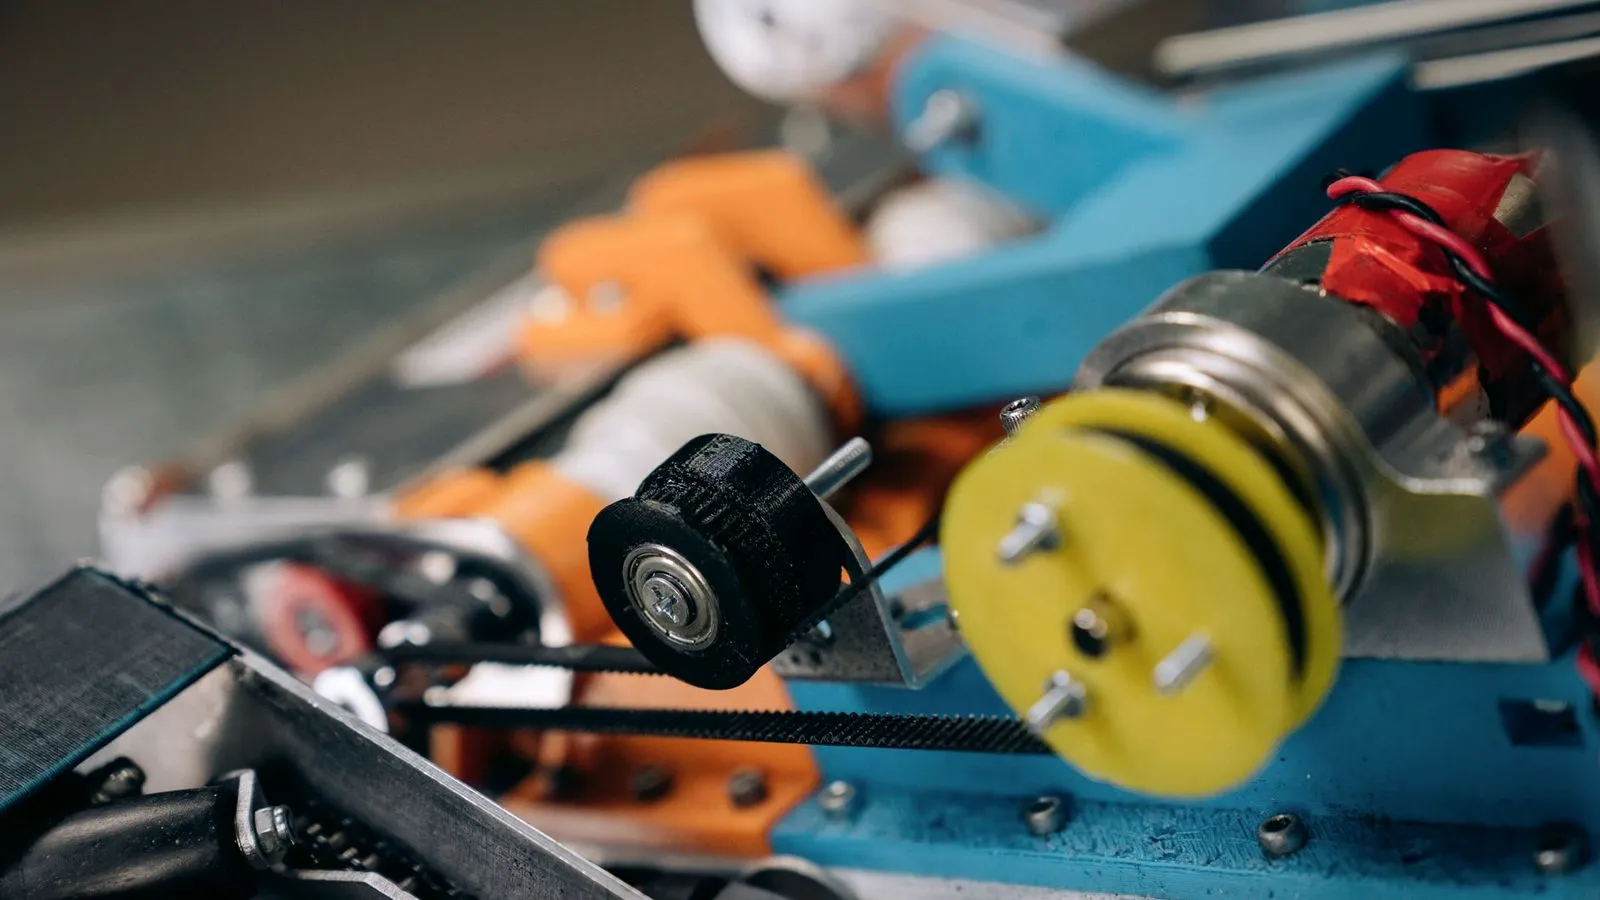
3D printed joints work on a fused deposition modeling (FDM) printer when three things are right: a clearance gap the printer can hold, about 0.15–0.5 mm depending on the fit, an orientation that makes the joint bend along the layers rather than across them, and a plastic that flexes without cracking, such as PETG or nylon rather than brittle PLA.
This guide covers the main joint types, how to design a snap fit, which clearances to start from and how to test them before you print the real part. For ready-made articulated models and how to keep their joints moving, see our guide to 3D printed articulated toys.
The short answer
- Pick the joint for the job: snap fits for lids, hinges for things that swing, ball joints for posable parts, dovetails for splitting big prints.
- Leave a gap: about 0.15–0.20 mm for snug alignment, 0.20–0.25 mm for sliding parts and 0.30–0.40 mm for loose parts on well-tuned Prusa MK4 and XL printers. Print-in-place joints need the larger end.
- Print flexing parts flat: Prusament PLA’s layers hold together at 17 MPa, about a third of the 51 MPa the plastic takes along the layers.
- Use a tough plastic: PETG or nylon for snap fits, polypropylene (PP) for living hinges, TPU (thermoplastic polyurethane) for soft straps.
- Test the fit first with a small piece in the same material and orientation.
Types of 3D printed joints
3D printed joints fall into two groups: joints that snap or lock two separate parts together, and joints that let parts move against each other. The table covers the common types and where each one fits.
| Joint | How it works | Good for | Watch out for |
|---|---|---|---|
| Cantilever snap fit | A hooked arm bends, then catches behind a ledge (the undercut) | Lids, enclosures, battery doors | Cracks at the root if too stiff or printed upright |
| Annular snap fit | A ring flexes over a ridge on a round part | Caps, round covers | Needs a plastic that stretches a little |
| Torsion snap fit | A bar twists instead of bending | Latches and levers that must open again | More design work than a simple hook |
| Print-in-place hinge | A pin inside a sleeve, printed together with a gap | Boxes, flexi toys | The first layer can fuse the gap shut |
| Pin hinge (assembled) | Separate leaves joined by a pin | Doors and covers that take repeated use | Pin must be printed lying down or made from rod |
| Ball joint | A ball held in a socket | Posable figures, camera and lamp arms | Grip changes with the gap and the plastic |
| Dovetail or puzzle joint | Shaped tongues slide into matching slots | Splitting parts too big for the bed | Thin features snap; glue for strength |
| Living hinge | A thin strip that bends each time the part opens | Flip lids, clamshell boxes | Only in fatigue-resistant plastics such as PP |
Formlabs, a resin and powder printer maker, calls the dovetail the most popular simple joint to model and tongue joints ideal for hobby projects, but warns that thin comb joints break easily.
3D print snap fit design: the cantilever clip
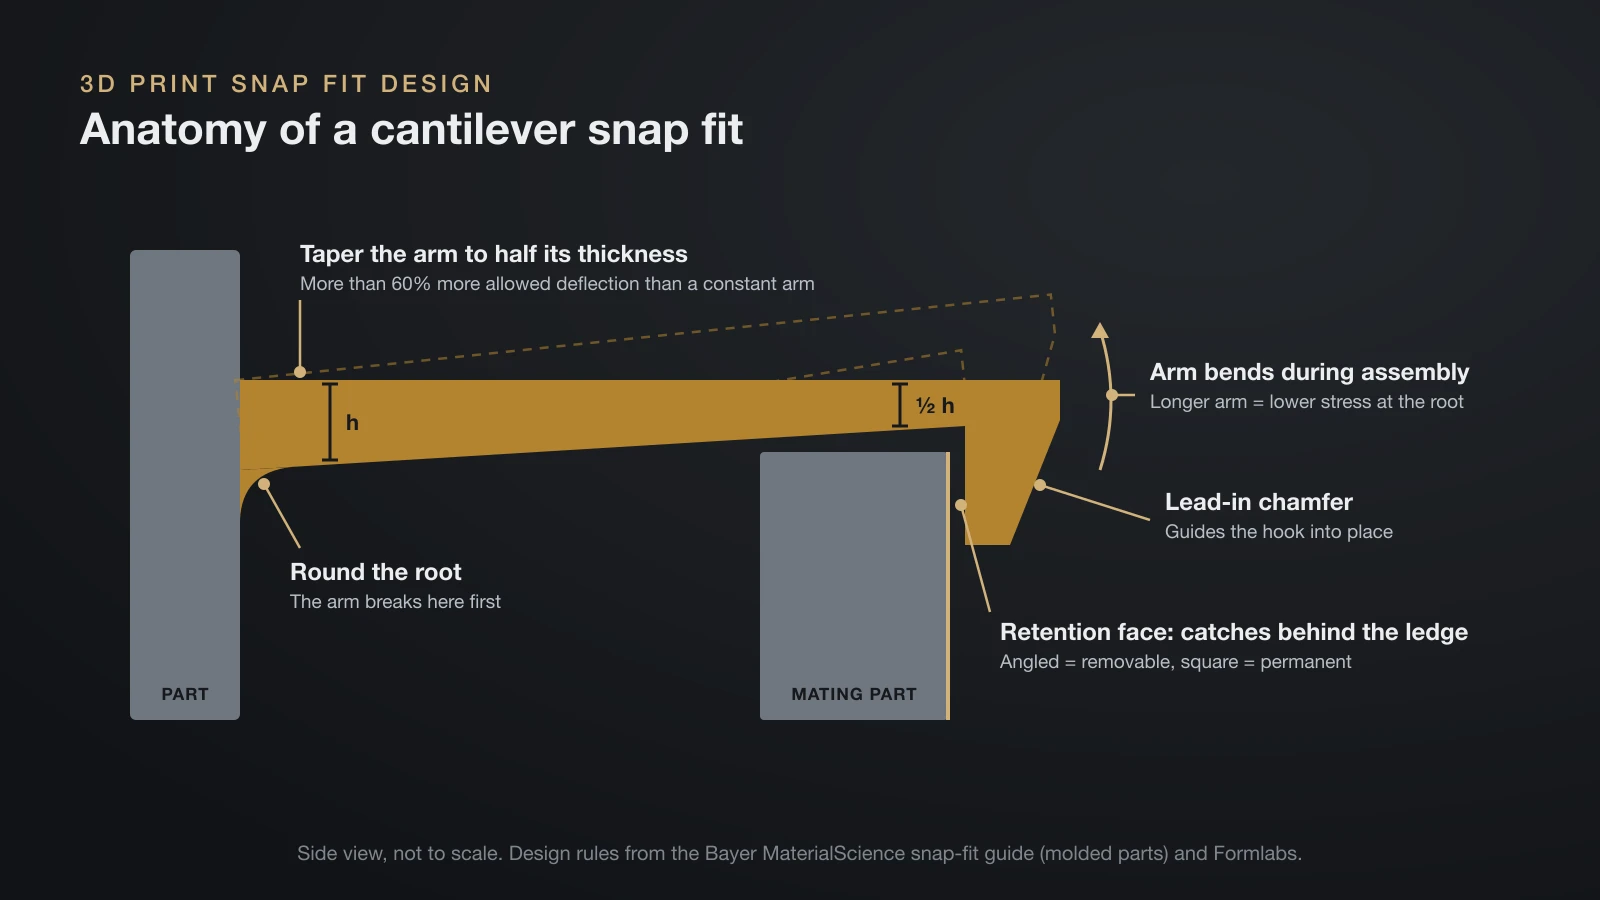
A cantilever snap fit is a flexible arm with a hook on its end that bends aside during assembly and springs back behind a ledge. It is the most common snap fit, and a few design rules decide whether it clicks or cracks.
- Taper the arm. Bayer MaterialScience’s snap-fit design guide recommends thinning the arm linearly to half its root thickness at the hook. Compared with an arm of constant thickness, that raises the allowed deflection by more than 60%.
- Make it longer, not thicker. Formlabs notes that a longer arm lowers the stress at its base, and a lower hook reduces both stress and the force needed to assemble it.
- Round the root. The root is where the arm breaks, so avoid a sharp inside corner there. Bayer’s guide weighs a larger radius (less stress) against a thick section behind it.
- Shape the hook for the job. An angled back face lets the parts come apart again; a square back face makes the joint close to permanent.
- Add a lead-in. A chamfer on the entry edge guides the hook into place and hides small dimensional errors.
Bayer’s numbers come from molded plastic parts, which have no layer lines. A printed arm is weaker between layers, so treat these rules as a starting point and test the clip in your own material.
Annular and torsion snap fits follow the same logic: bend gently, over as much length as possible, never across the layers.
Clearances for 3D printed joints
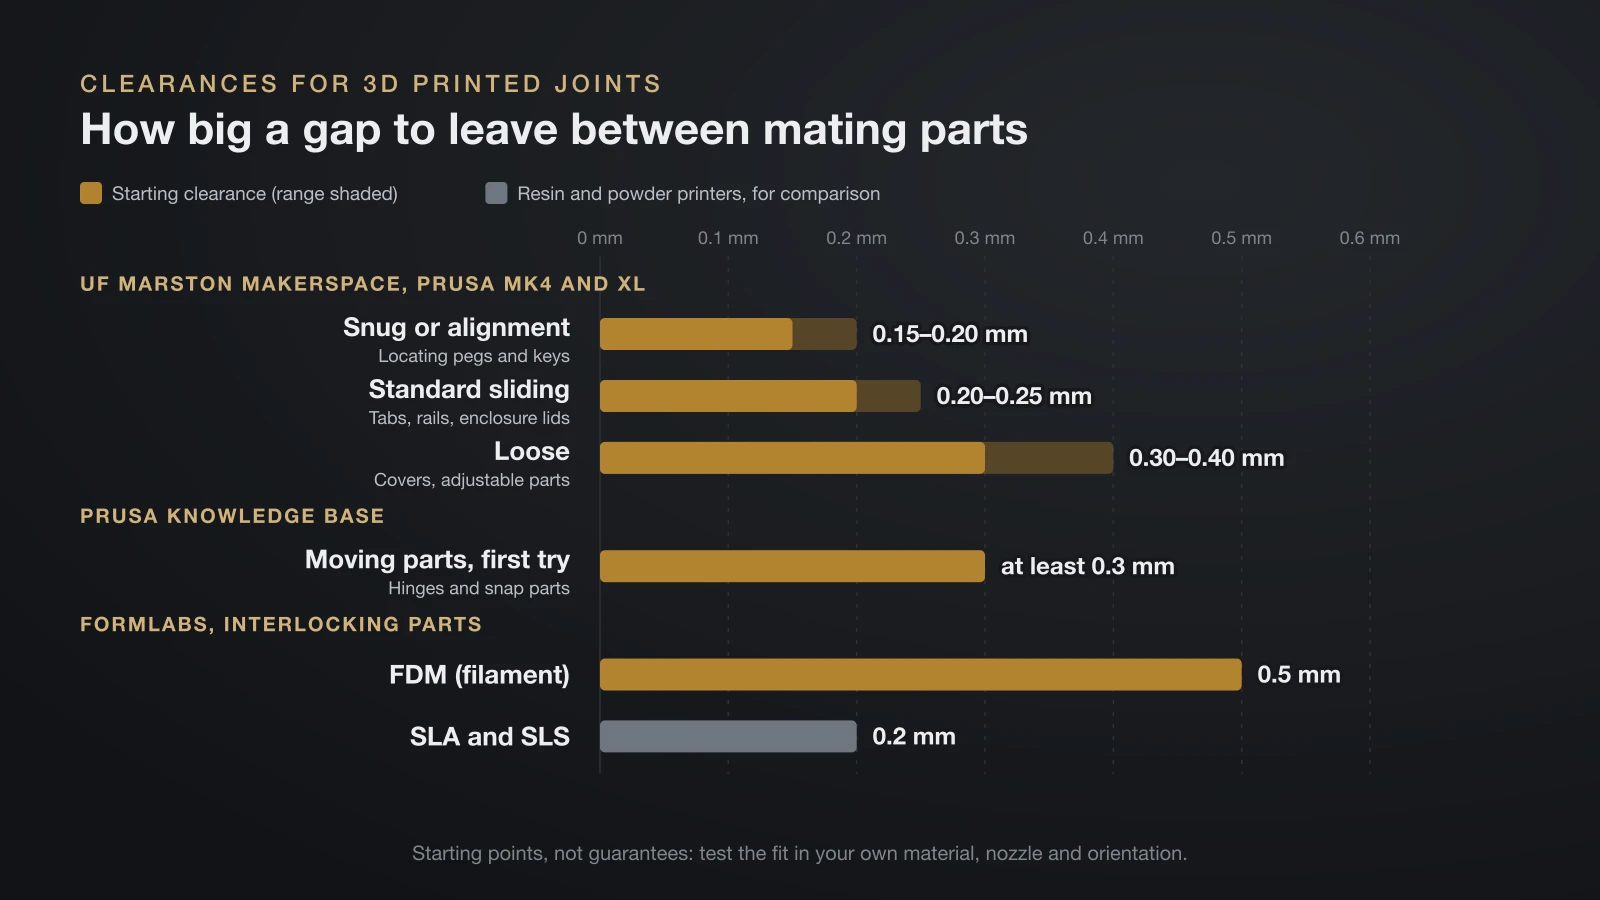
A clearance is the gap you design between two mating parts, and FDM joints need more of it than you might expect. Printed parts come out slightly larger or smaller than the CAD model because of how plastic flows, cools and stacks in layers, so zero-gap parts will not go together.
| Fit | Starting clearance (gap) | Typical use | Source |
|---|---|---|---|
| Snug or alignment | 0.15–0.20 mm | Locating pegs and keys | UF Marston Makerspace, Prusa MK4 and XL |
| Standard sliding | 0.20–0.25 mm | Tabs, rails, enclosure lids | UF Marston Makerspace |
| Loose | 0.30–0.40 mm | Covers, adjustable parts | UF Marston Makerspace |
| Moving parts (first try) | At least 0.3 mm | Hinges and snap parts | Prusa Knowledge Base |
| Interlocking parts on FDM | 0.5 mm | General FDM assemblies | Formlabs |
The University of Florida’s makerspace adds that print-in-place mechanisms use the larger end of the sliding and loose ranges. Formlabs lists 0.5 mm for FDM against 0.2 mm for resin (SLA) and powder (SLS) printers, because FDM parts hold slightly looser tolerances.
These are starting points, not guarantees. Prusa says its printers are accurate to at least 0.2 mm, but materials can still warp or shrink, and your nozzle, settings and filament all move the result.
Print orientation and layer lines
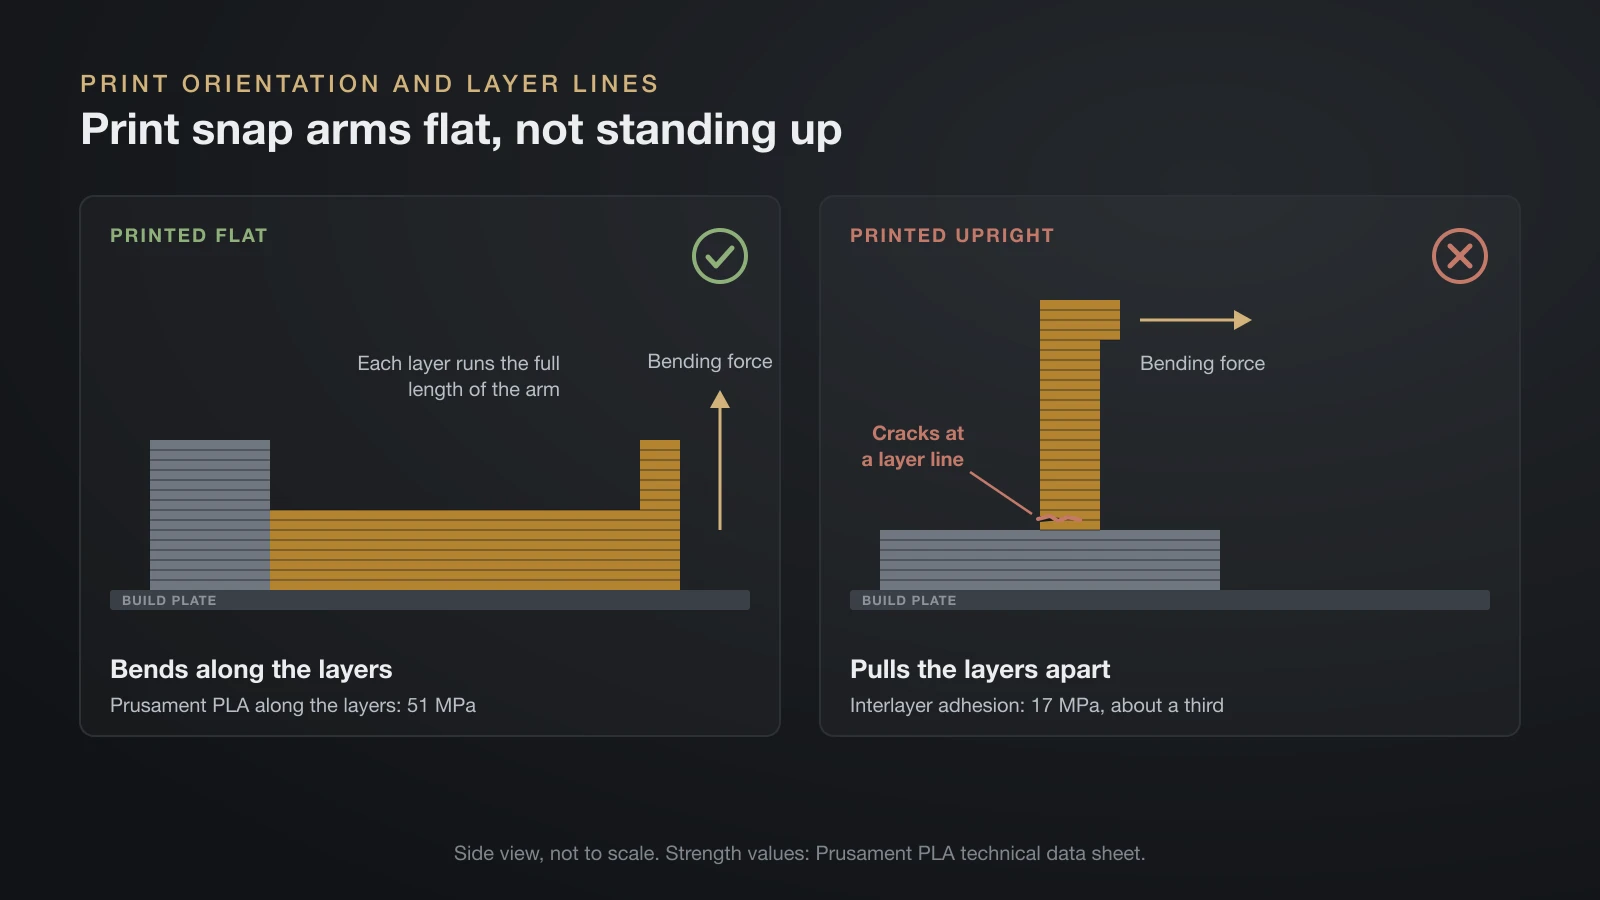
Print orientation decides whether a joint bends along its layers or tries to pull them apart, and that difference is large. Prusament’s data sheet gives PLA a tensile yield strength of 51 MPa along the layers but an interlayer adhesion of only 17 MPa, about a third.
Prusa compares printed parts to wood: like a board, they are stronger in one direction than another. For joints, that means:
- Lay snap arms flat on the bed so they bend within a layer. Formlabs rates FDM as only fair for snap fits for this reason and says to orient them for strength in the X-Y plane, not along Z.
- Print pins and hinge leaves lying down. A thin pin printed upright is a stack of small discs that can shear off at any layer line.
- Split the part if one orientation cannot suit every feature. Prusa suggests splitting models so each piece prints in its best orientation, then gluing them with pegs for alignment.
- Keep supports out of joints, because support inside a gap is hard to remove; our 3D printing supports guide shows how to control where they go.
Layer height matters too. Formlabs notes that layer lines make perfectly round tenon joints difficult on FDM printers, and thinner layers give smoother curves, as our guide to 3D printing layer height explains.
Best material for 3D printed joints
The best material for 3D printed joints is one that bends without cracking: PETG and nylon for most snap fits, polypropylene for living hinges and TPU for soft, flexible joints. PLA works for joints that are assembled once and left alone.
| Material | How it behaves in a joint | Best joint use |
|---|---|---|
| PLA | Stiff and accurate, but Prusament calls it somewhat brittle; unnotched Charpy impact of 13 kJ/m² and loses strength above 60 °C (140 °F) | Alignment pegs, one-time clips, print-in-place toys |
| PETG | Tougher than PLA; Prusament PETG did not break in the same unnotched Charpy test | Reusable snap fits, clips, enclosure lids |
| Nylon (PA) | Prusa calls polyamide extremely resilient and resistant to abrasion | Hinges, gears, clips that are opened often |
| TPU | Rubbery, about 60A–90A on the Shore hardness scale in Prusa’s guide | Straps, bumpers, grips, soft latches |
| Polypropylene (PP) | Polymaker calls it a go-to plastic for living hinges and snap fits thanks to its fatigue resistance | Living hinges, flip lids |
Nylon needs dry filament and a hot nozzle, as our nylon filament guide explains, and flexible plastic has its own settings in our TPU filament guide.
Living hinges: only with the right plastic
A living hinge is a thin strip that bends every time a lid opens, like the hinge on a flip-top cap, so the plastic must resist fatigue. Polypropylene fits, but Prusa lists heavy warping and poor bed adhesion and does not recommend it for beginners. In PLA, a thin hinge strip is more likely to crack than flex.
Print-in-place hinges and ball joints
A print-in-place joint comes off the printer already assembled, with a clearance gap between the moving parts that the printer must keep open. It saves assembly but forgives less than separate parts.
- Use the larger clearances, because parts printed together must survive sagging, stringing and the first layer.
- Watch the first layer. Prusa explains that the squished first layer usually ends up wider than it should be, which can weld a joint shut; PrusaSlicer’s elephant foot compensation shrinks it back.
- Do not rescale the model, since scaling the part scales its gaps too.
Ball joints printed in place use the same gap all around the ball. Printed separately, a socket with a few slits can flex open and snap over the ball, and the gap then sets how stiffly the joint holds a pose. Our articulated toys guide covers freeing a stuck joint.
Tolerance test prints: dial in the fit
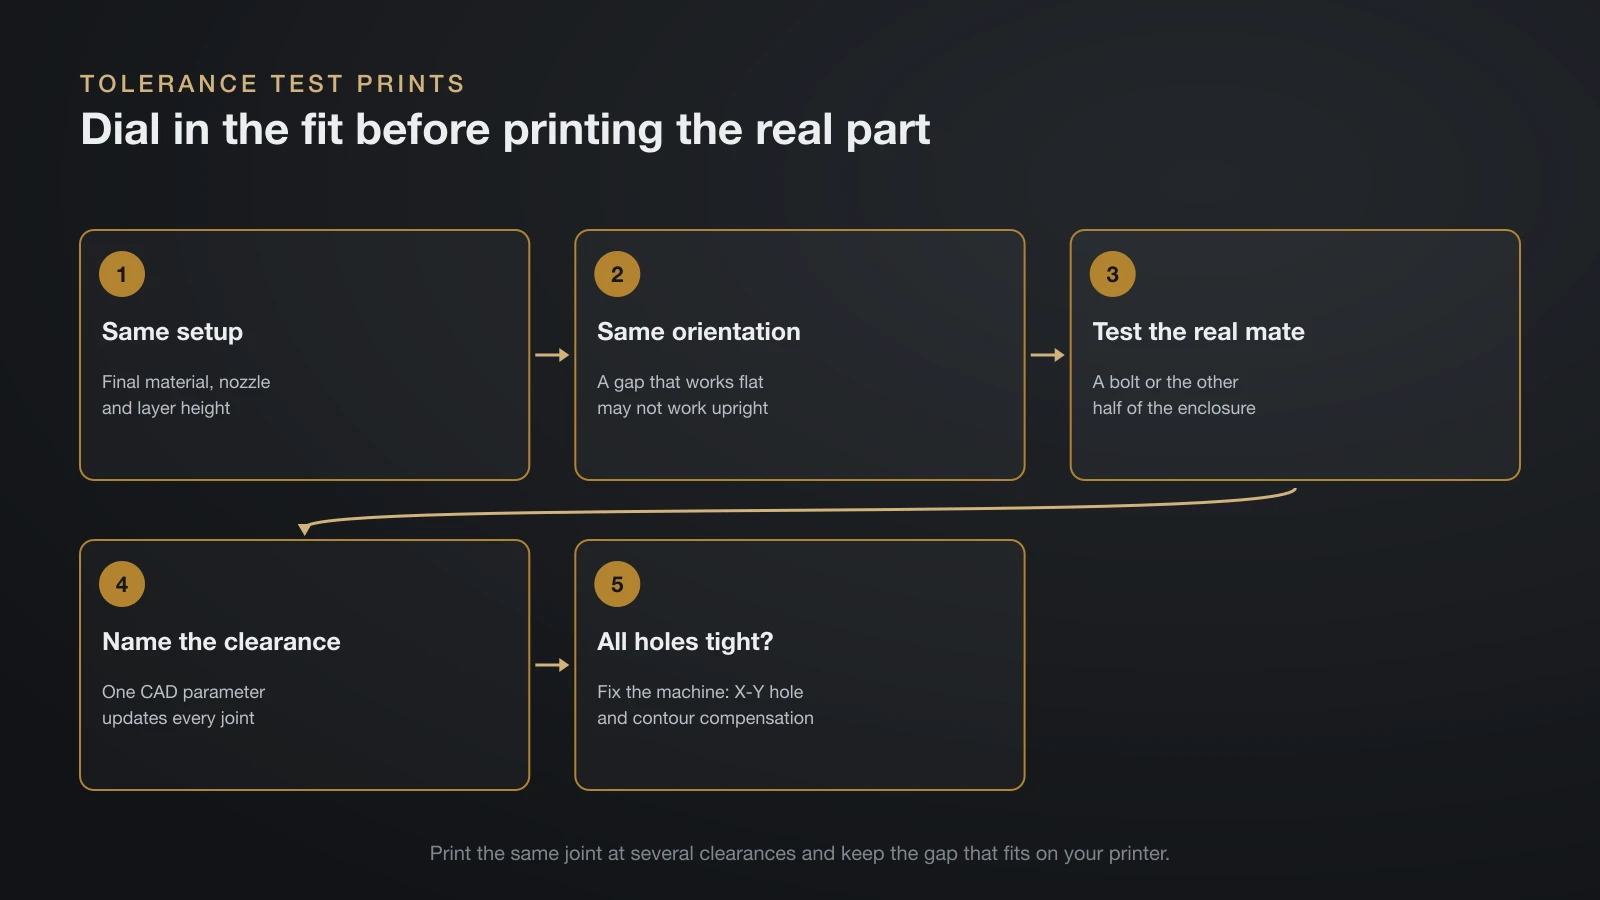
A tolerance test print is a small piece with the same joint at several clearances, so you can see which gap works on your printer before printing the real part.
- Print the test in the final material, nozzle and layer height, because each one changes the fit.
- Keep the orientation you plan to use. A gap that works flat may not work standing up.
- Check it against the real mating part, such as a bolt or the other half of the enclosure.
- Store the clearance as a named parameter in your CAD model, so changing one number updates every joint.
- If every hole is tight, fix the machine: use the slicer’s X-Y hole and contour compensation, covered in our guide on how to calibrate a 3D printer.
Assembling and finishing printed joints
Assembling printed joints goes best with clean edges, a little patience and glue only where the joint should never come apart.
- Chamfer the edges that slide together. Prusa notes that a chamfer on parts that slot together saves a lot of effort at assembly.
- Clean off strings and the first-layer lip with a deburring tool or a fine file before forcing anything.
- Glue permanent joints properly. Formlabs suggests cyanoacrylate or two-part epoxy for glued dovetails, and Prusa advises smooth, grease-free, lightly sanded surfaces. For PLA parts, our guide to the best glue for PLA compares set and cure times.
Do not rely on printed snap fits or hinges in anything that carries a person’s weight or protects someone from injury. Printed plastic can split along a layer line without warning, so use proper hardware there.
The bottom line
3D printed joints work when you design for the printer: leave a clearance of roughly 0.15–0.5 mm depending on the fit, taper and lengthen snap arms, and print anything that flexes flat so it bends along the layers. Choose PETG or nylon for reusable snap fits and polypropylene for living hinges, and print a quick tolerance test before committing to the full part.
Sources
- Prusa Research: Knowledge Base Modeling with 3D printing in mind (0.2 mm accuracy, at least 0.3 mm for movable parts, directional strength, splitting, chamfers, gluing), Elephant foot compensation, Flexible materials (TPU 60A–90A), Polyamide (Nylon) and Polypropylene (PP); Prusament PLA and PETG data sheets and PLA page (51 MPa vs 17 MPa interlayer, Charpy unnotched 13 kJ/m² vs no break, 60 °C)
- University of Florida, Marston Makerspace: Designing for 3D Printing Tolerances on the MK4 and XL (clearances by fit, print-in-place, lead-ins)
- Formlabs: Interlocking parts and assemblies (0.5 mm FDM vs 0.2 mm SLA and SLS, joint types, glue) and Snap-fit joints (snap-fit types, X-Y orientation, hook length and height)
- Bayer MaterialScience: Snap-Fit Joints for Plastics, A Design Guide, hosted by MIT (tapered arm, more than 60% more deflection, root radius, undercut shape)
- Polymaker Wiki: PP (fatigue resistance, living hinges and snap fits)