The 3D printing slicer settings that matter most are walls, top and bottom layers, infill, print speed, cooling, retraction and bed adhesion (brim, skirt or raft). Safe starting values from official profiles are two walls, five top layers, about 15% infill, 100% fan for PLA and a speed capped by the filament’s melt limit. Everything else can usually stay at the slicer default.
Layer height is the other big setting; it has its own guide on 3D printing layer height. If slicing itself is new to you, see how a slicer turns an STL into G-code first.
The short answer
| Setting | What it changes | Safe starting value | Source |
|---|---|---|---|
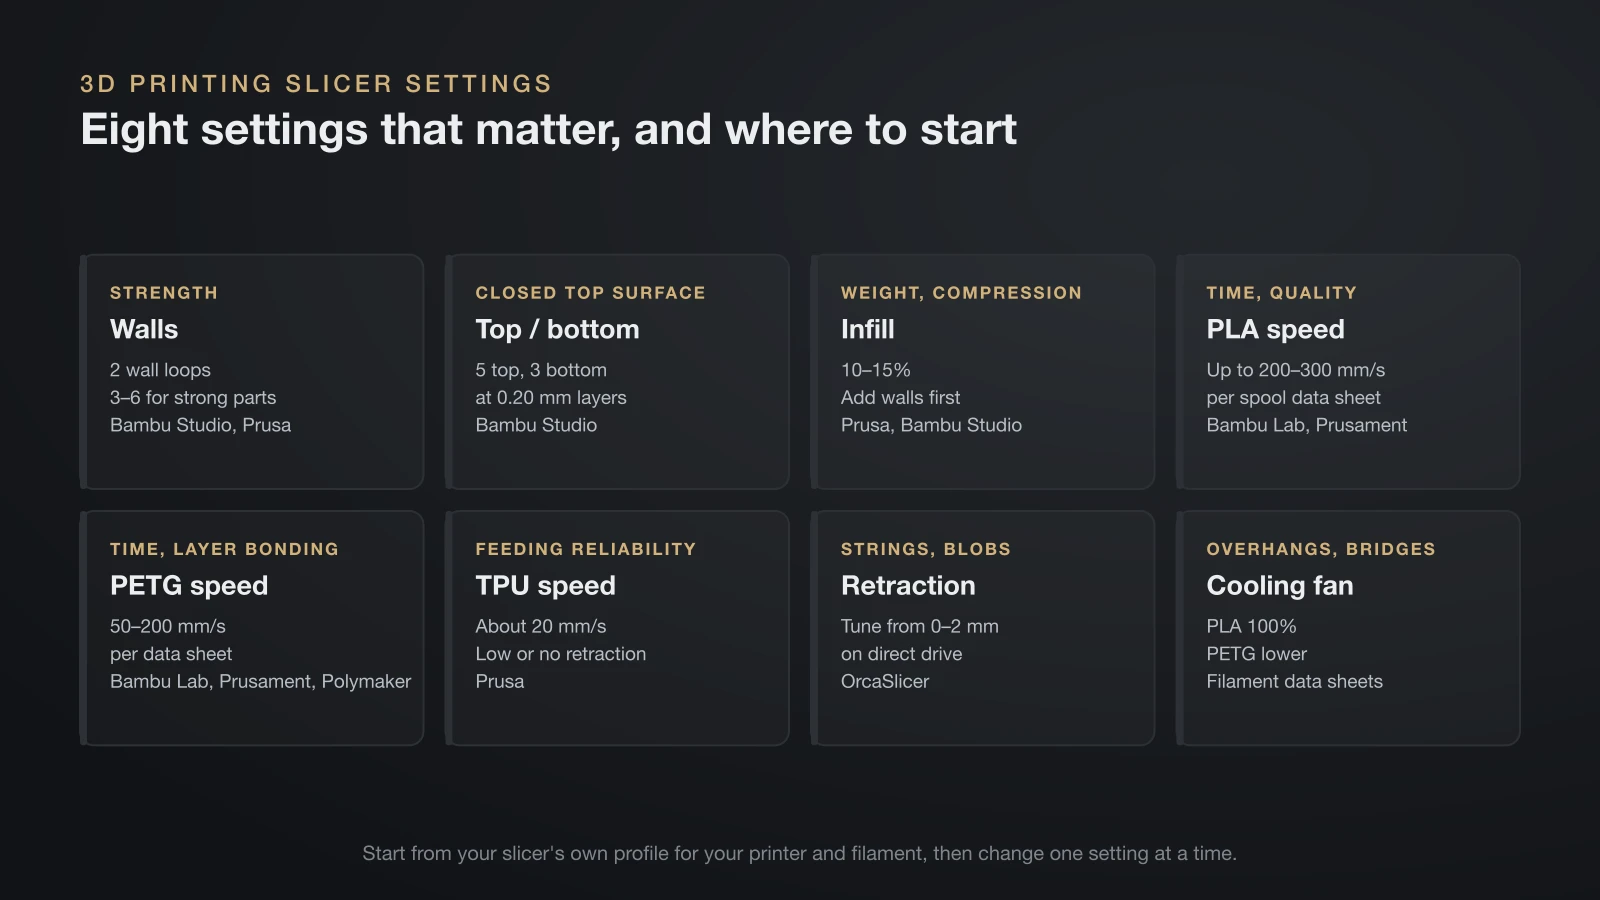
| Walls (wall loops, perimeters) | Strength, stiffness | 2; 3–6 for strong parts | Bambu Studio, Prusa |
| Top / bottom layers | Closed, smooth top surface | 5 top, 3 bottom at 0.20 mm layers | Bambu Studio |
| Infill density | Weight, compression resistance | 10–15% | Prusa, Bambu Studio |
| PLA print speed | Time, quality | Up to 200–300 mm/s, per spool data sheet | Bambu Lab, Prusament |
| PETG print speed | Time, layer bonding | 50–200 mm/s, per data sheet | Bambu Lab, Prusament, Polymaker |
| TPU print speed | Feeding reliability | About 20 mm/s | Prusa |
| Retraction | Strings, blobs | Tune from 0–2 mm (direct drive) | OrcaSlicer |
| Part cooling fan | Overhangs, bridges | PLA 100%; PETG lower | Filament data sheets |
| Brim | Adhesion of small or tall parts | Auto (Bambu Studio) | Bambu Lab |
Start from your slicer’s own profile for your printer and filament, then change one setting at a time.
Where to find slicer settings
Most slicers group the same settings under similar tabs. Bambu Studio and OrcaSlicer split the process settings into Quality, Strength, Speed, Support and Others tabs, and OrcaSlicer adds Multimaterial, one of the extras covered in our Orca Slicer vs Bambu Studio comparison. UltiMaker Cura uses Walls, Top/Bottom, Infill, Speed, Travel (where retraction lives), Cooling and Build Plate Adhesion. PrusaSlicer uses perimeters for walls and has its own PrusaSlicer layout.
Wall loops (Bambu Studio, OrcaSlicer), perimeters (PrusaSlicer) and wall line count (Cura) all mean the same thing.
Walls, wall loops and wall thickness
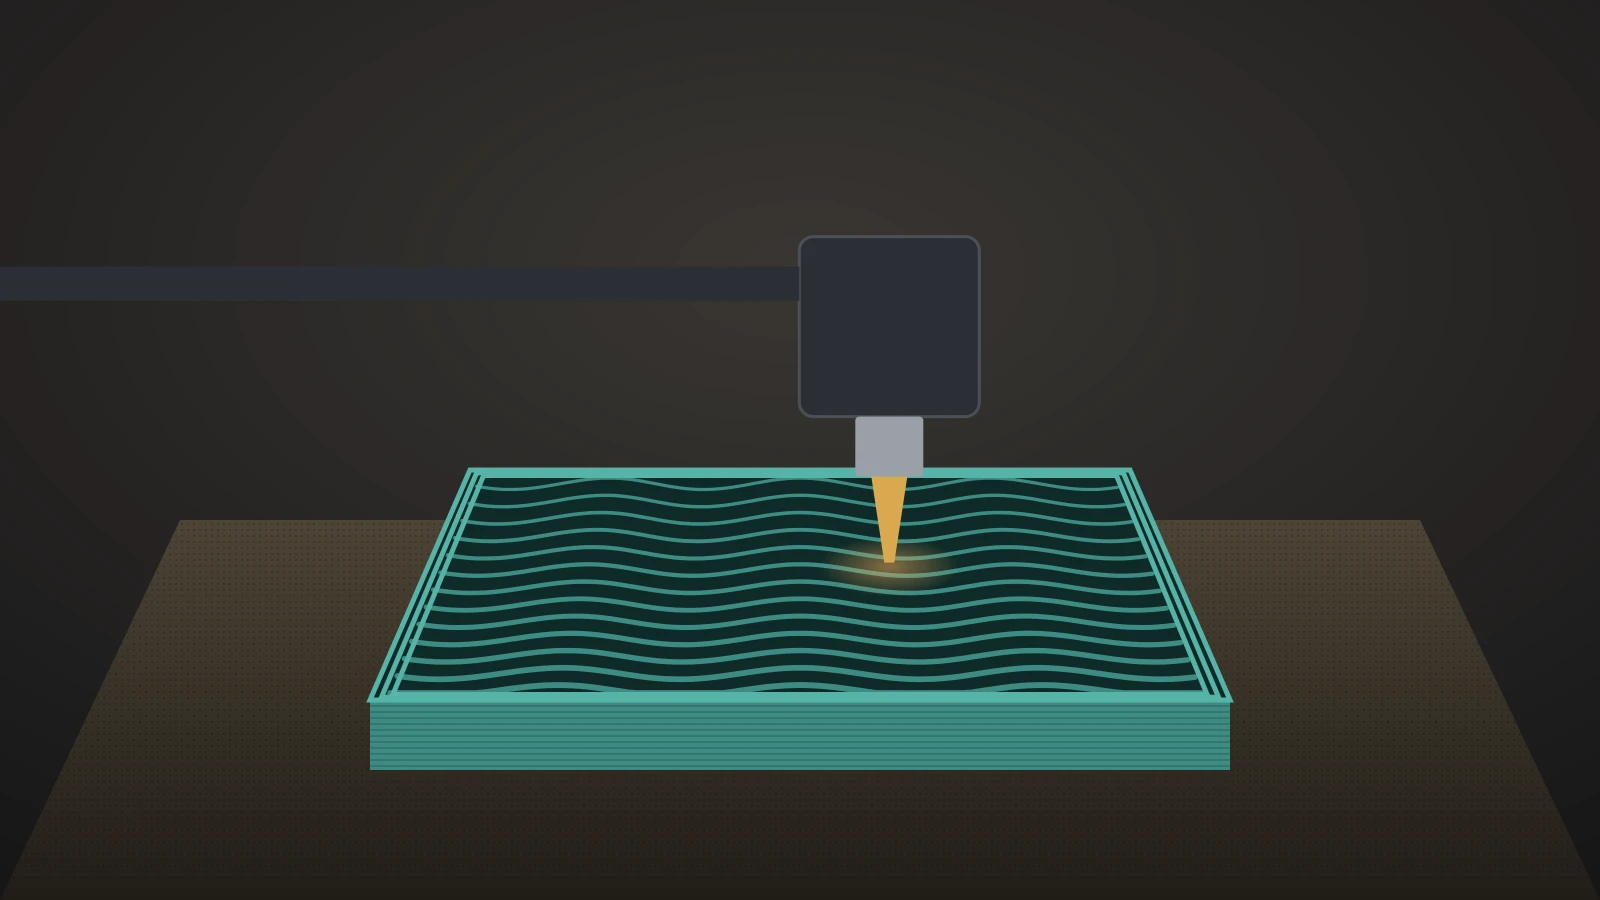
Walls are the outlines printed around every layer, and they are the main source of a part’s strength. Prusa says a model’s strength is mostly defined by the number of perimeters, not the infill, and OrcaSlicer’s wiki adds that more wall loops improve rigidity and layer adhesion at the cost of print time.
How many wall loops?
Two walls is the safe minimum for everyday parts. Bambu Studio’s Standard 0.20 mm profile uses 2 wall loops and 15% infill, and Prusa says its profiles always use at least two perimeters. Bambu Studio’s Strength profile shows what a tough part looks like: 6 wall loops and 25% infill.
| Part | Wall loops | Example profile |
|---|---|---|
| Decorative, light use | 2 | Bambu Studio Standard 0.20 mm |
| Handled, screwed or clipped | 3–4 | Between the two presets |
| Load-bearing, tough | 6 | Bambu Studio Strength 0.20 mm |
Minimum wall thickness for 3D printing
A wall must be at least one extrusion line wide to print at all. PrusaSlicer prints a 0.4 mm nozzle with 0.45 mm lines, so Prusa gives wall thicknesses of about 0.45 mm for one perimeter, 0.9 mm for two, 1.35 mm for three and 1.8 mm for four. UltiMaker’s design guide sets the floor at the nozzle diameter.
Walls between whole line counts leave gaps. For thin features, OrcaSlicer’s wiki recommends the Arachne wall generator, which varies line width to fit them.
Wall thickness vs wall line count in Cura
Cura sets walls by thickness: its base 0.8 mm Wall Thickness divided by the line width gives the Wall Line Count, 2 by default. Extra Skin Wall Count is different: it replaces the outer edge of top and bottom surfaces with concentric lines, which Cura says improves roofs that start on infill.
If the walls come out bulging or holes too small even with the right count, the flow may be off; see our guide to 3D printing over-extrusion.
Top and bottom layers
Top and bottom layers are the solid layers that close the part above and below the infill. Too few, and the top surface sags or shows the infill pattern through it. OrcaSlicer recommends at least 3 shell layers for most prints, and Prusa suggests at least 3 top layers.
The right count depends on layer height. Prusa uses 3 top layers at 0.3 mm and 9 at 0.1 mm. Bambu Studio’s Standard 0.20 mm profile uses 5 top and 3 bottom layers, with a 1.0 mm minimum top shell thickness. In OrcaSlicer and Bambu Studio, the shell thickness setting adds layers automatically when the layer count alone would leave the shell too thin.
Infill density: how much you need
Infill is the internal fill, and most parts need far less of it than beginners expect. Prusa says most models print fine at 10–15% infill and treats 30% as an upper limit for most uses, with 100% rarely needed. Bambu Studio’s Standard profile uses 15% in a grid pattern, and Cura’s base definition uses 20%.
For more strength, add walls before you raise the infill percentage.
Print speed and the volumetric flow limit
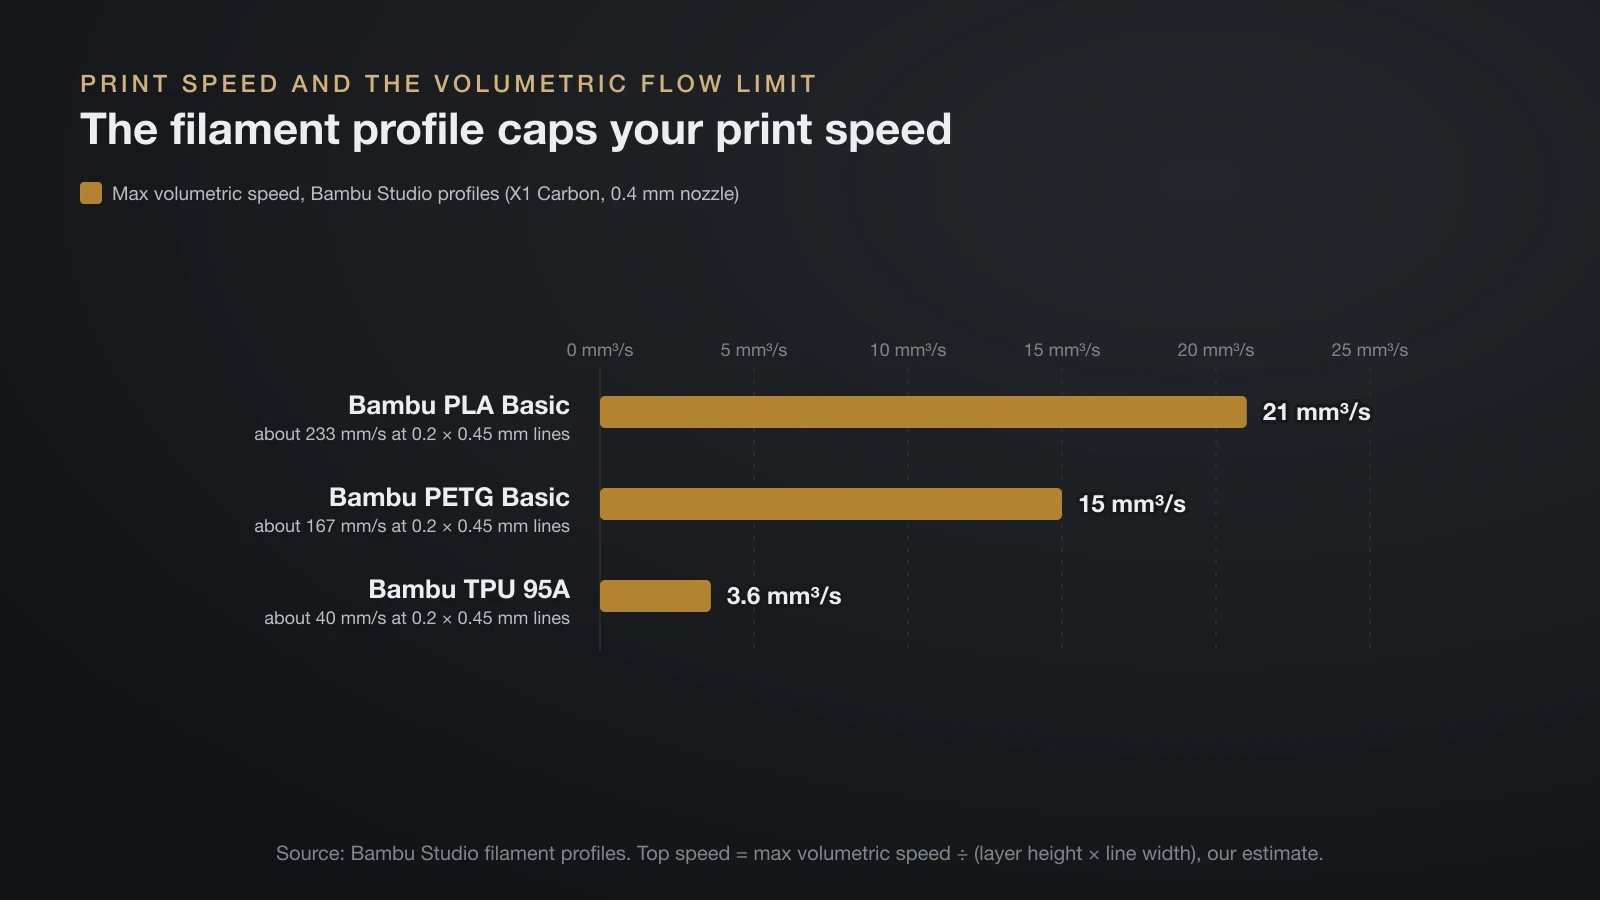
Print speed is limited less by how fast the head can move and more by how fast the hotend can melt plastic. Bambu Lab’s wiki gives the formula: volumetric speed (mm³/s) = layer height × line width × print speed. A 0.2 mm layer with a 0.45 mm line at 200 mm/s needs 18 mm³/s, and the same line at 300 mm/s needs 27 mm³/s.
Each filament profile stores a maximum volumetric speed, and when a feature would need more flow, the slicer slows it down automatically. OrcaSlicer’s wiki says this limit prevents clogs, under-extrusion and poor layer adhesion, so the speed you type in is only an upper bound.
| Bambu Studio profile (X1 Carbon, 0.4 mm nozzle) | Max volumetric speed | Top speed at 0.2 × 0.45 mm lines (estimate) |
|---|---|---|
| Bambu PLA Basic | 21 mm³/s | About 233 mm/s |
| Bambu PETG Basic | 15 mm³/s | About 167 mm/s |
| Bambu TPU 95A | 3.6 mm³/s | About 40 mm/s |
The last column is our calculation: max volumetric speed ÷ (0.2 mm × 0.45 mm). Faster hotends raise the limit; Bambu Lab says its H2 series reaches about 35 mm³/s with PLA Basic through a 0.4 mm High Flow nozzle.
PLA print speed
PLA is the fastest common filament, and current data sheets rate it at up to 200–300 mm/s. Those numbers assume a hotend built for them, so let the volumetric limit decide on older printers.
| PLA | Print speed on the data sheet |
|---|---|
| Bambu Lab PLA Basic | Under 300 mm/s |
| Prusament PLA | Up to 200 mm/s |
| Polymaker PolyLite PLA | 50–200 mm/s |
Surface finish can call for slower walls even on fast machines. For silk PLA, Bambu Lab recommends outer walls at 40–60 mm/s at a constant speed for an even gloss. Speed and temperature also work together: faster printing needs more heat, which our PLA temperature guide covers.
PETG and TPU print speed
PETG prints more slowly than PLA, and flexible TPU much more slowly still. PETG’s molten plastic is thicker and tends to stick to the nozzle, which Bambu Lab lists among the reasons its maximum volumetric speed sits below PLA’s.
| Filament | Print speed from the maker |
|---|---|
| Bambu Lab PETG Basic | Under 200 mm/s |
| Prusament PETG | Up to 200 mm/s |
| Polymaker PolyLite PETG | 50–100 mm/s |
| Flexible filament (TPU), Prusa guidance | Typically 20 mm/s, at most 30–40 mm/s |
For PETG, raise the nozzle temperature only when you print fast; the details are in our PETG temperature guide. For TPU, Prusa warns that fast printing risks jams in the extruder, and Bambu Lab rates TPU’s maximum volumetric speed the lowest of the common materials because the soft strand compresses and buckles.
Retraction settings
Retraction pulls the filament back slightly before travel moves so the nozzle does not ooze strings. OrcaSlicer’s retraction test covers 0–2 mm in 0.1 mm steps, which it calls suitable for most direct-drive extruders, and 1–6 mm in 0.2 mm steps for Bowden setups.
If the test tower looks clean from the start, OrcaSlicer suggests 0.2–0.4 mm is enough. If strings remain even at the longest setting, dry the filament and check the nozzle rather than adding more retraction. For TPU, Prusa recommends low retraction or none at first, then raising it while watching the results.
Cooling fan settings in the slicer
The part cooling fan hardens each fresh layer quickly, which sharpens overhangs and bridges, but too much airflow weakens layer bonding on some materials. PLA takes full cooling: Prusament PLA and Bambu Lab’s PLA profile run the fan at 100%. PETG wants less, from off to 20% for Polymaker PolyLite PETG, up to 60% on Bambu Lab’s PETG Basic data sheet and 50% for Prusament PETG.
OrcaSlicer’s “No cooling for the first” setting keeps the fan off for the first layers to improve bed adhesion and reduce early warping.
Brim, skirt and raft
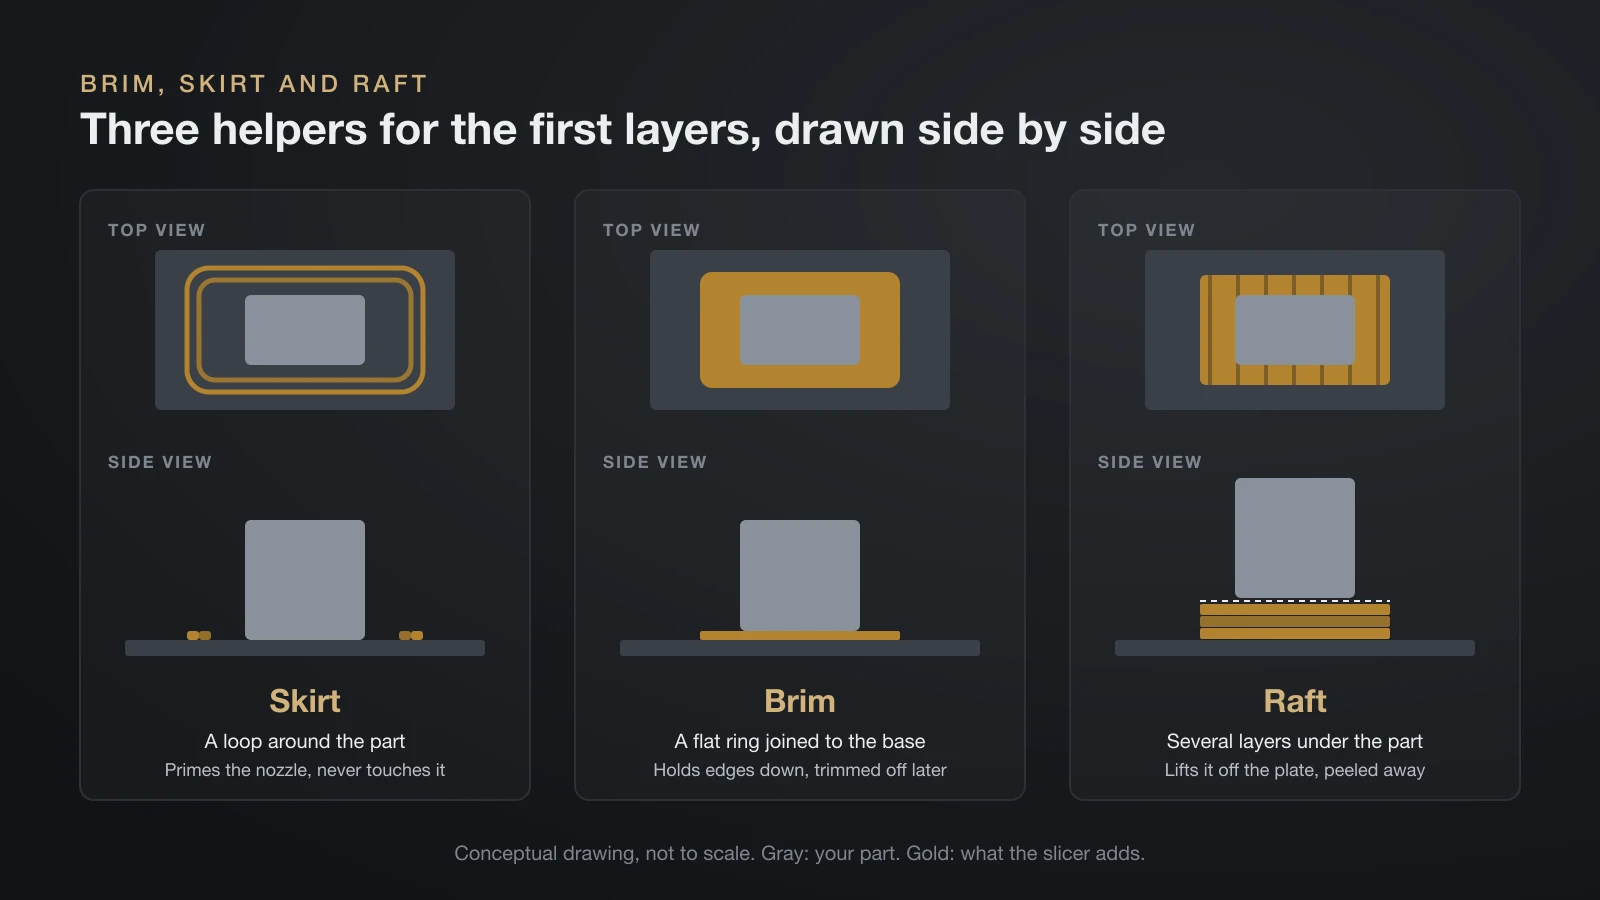
A brim, skirt and raft all help the first layers, but in different ways. A brim is a flat, single-layer ring around the base that holds edges down; a skirt is a loop drawn around the part that primes the nozzle without touching it; a raft is a multi-layer base printed under the part.
| Option | What it does | When to use it |
|---|---|---|
| Skirt | Primes the nozzle; OrcaSlicer usually recommends 2 loops | Most prints, if your printer has no purge line |
| Brim | Adds grip around the base | Tall, thin or small-footprint parts, warp-prone materials |
| Raft | Lifts the part onto a printed base | Parts that warp or lift even with a brim |
How to add a brim in Bambu Studio
- Select the object and open the process settings.
- Go to the Others tab and find Brim type in the bed adhesion group.
- Keep Auto (the default) to let Bambu Studio decide per part, based on shape, filament and speed.
- To force a brim, choose Outer brim only and set Brim width; the Standard profile’s width is 5 mm.
- Adjust Brim-object gap: a smaller gap bonds better, a larger one peels off more easily.
Brim settings are per object, so each part on the plate can have its own. If a brim leaves a lip, Bambu Lab notes that elephant foot compensation can keep a small gap even at a 0 mm setting.
Painted brim (brim ears) in Bambu Studio
A painted brim adds small round pads only at sharp corners, so there is less to trim. Set Brim type to Painted, open the Brim Ears tool, then auto-generate points or left-click to add ears (right-click removes them). They only show after slicing.
How to export and save OrcaSlicer settings
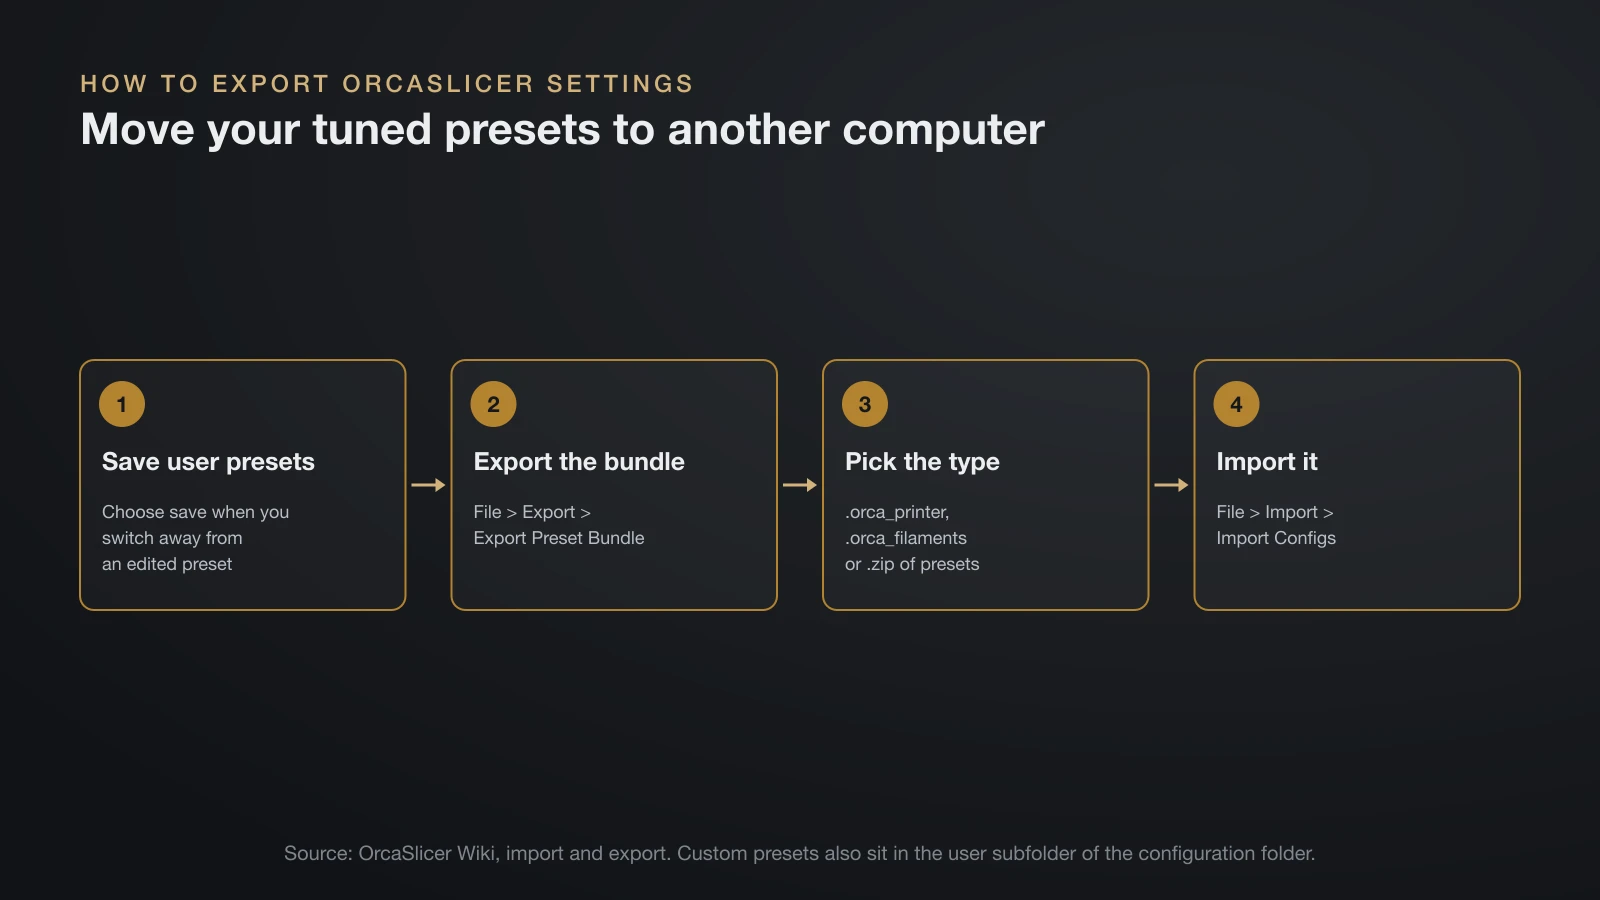
OrcaSlicer settings travel as preset bundles, so save your changes as user presets first. When you switch away from an edited preset, OrcaSlicer asks whether to discard, transfer or save the changes; choose save, or the edits stay only in the project file.
- Go to File > Export > Export Preset Bundle.
- Choose what to export: a printer config bundle (.orca_printer) with the printer and its filament and process presets, a filament bundle (.orca_filament), or .zip files of your printer, filament or process presets.
- Save the file somewhere safe or send it to the other computer.
- On the other machine, use File > Import > Import Configs and select the file.
Custom presets also sit as files in the user subfolder of the configuration folder, which Help > Show Configuration Folder opens (%APPDATA%\OrcaSlicer on Windows, ~/Library/Application Support/OrcaSlicer on macOS).
The bottom line
Good 3D printing slicer settings start from your printer’s official profile: two or more walls, about five top layers, 10–15% infill, full cooling for PLA and less for PETG. Add walls, not infill, for strength, and let each filament’s maximum volumetric speed cap your print speed. Use a brim for tall or small-footprint parts, and export your tuned presets as a bundle so you never have to rebuild them.
Sources
- Bambu Lab: Wiki pages on Volumetric speed, Auto brim, Brim ears and silk PLA printing; Bambu Studio’s official process and filament profiles; data sheets for PLA Basic and PETG Basic (volumetric formula, profile values, brim, speeds, fan)
- OrcaSlicer Wiki: Walls, Top and bottom shells, Volumetric speed limitation, Retraction calibration, Material cooling, Skirt, Import and export and User profiles (walls, shells, retraction, skirt, presets)
- Prusa: Knowledge Base Layers and perimeters, Infill, Modeling with 3D printing in mind and Flexible materials; Prusament PLA and PETG data sheet (walls, top layers, infill, TPU, PLA and PETG settings)
- Polymaker: PolyLite PLA and PolyLite PETG data sheets (speed and fan ranges)
- UltiMaker: Cura setting definitions and How to design for FFF (Cura walls, infill and categories; minimum wall)